
If you’ve noticed that your orchid leaves yellow edges are turning yellow, don’t panic! It’s possible that there is a simple solution to the problem. In this blog post, we will discuss the 11 most common reasons for orchid leaves turning yellow. We will also provide solutions to each of these problems so that you can get your your orchid leaves turn yellow and back to its healthy state.
The items listed are accompanied by affiliate links, meaning I earn a small commission if a purchase is made through my links. This has no impact on the cost to the consumer. I link to products this way whenever possible, and it has no bearing on the products I choose to review or recommend.

Common Reasons For Orchid Leaves Turning Yellow And Solutions
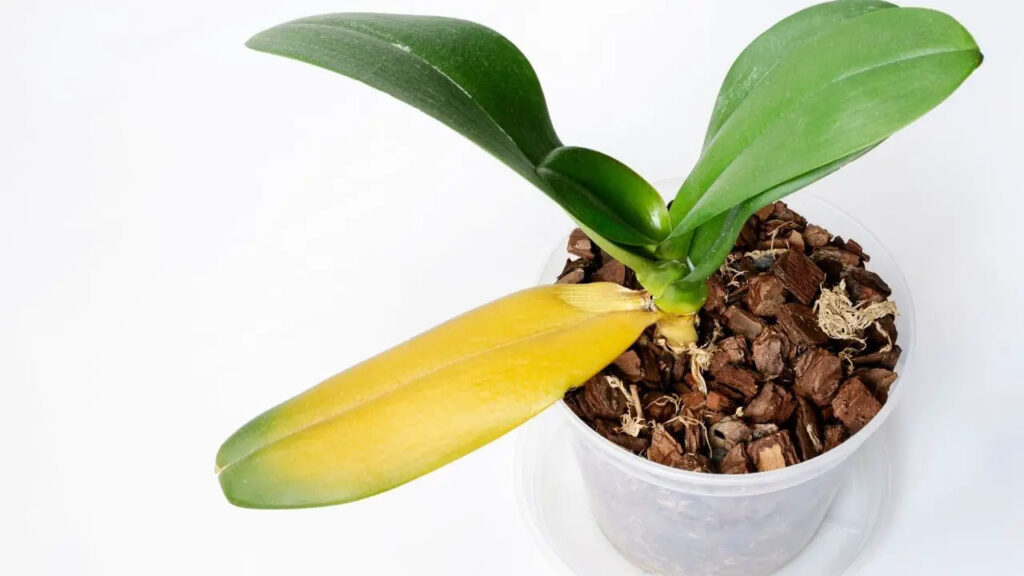
Natural Aging Process
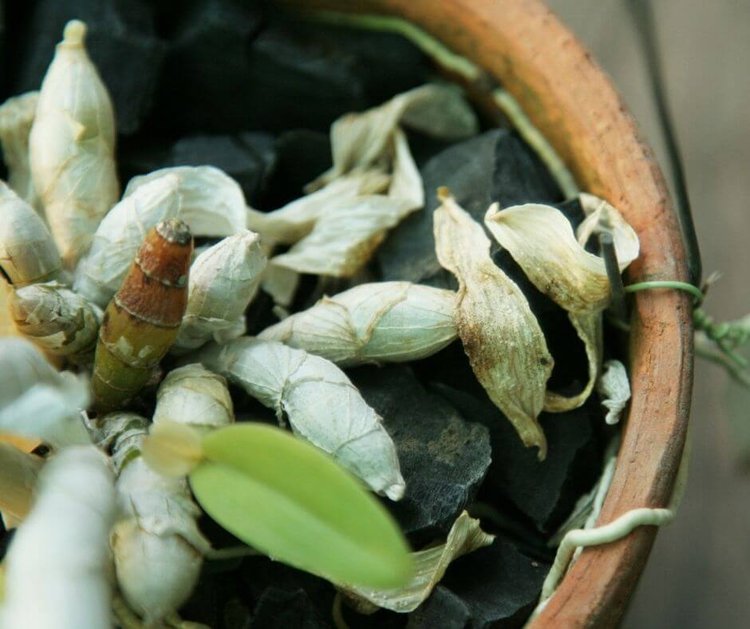
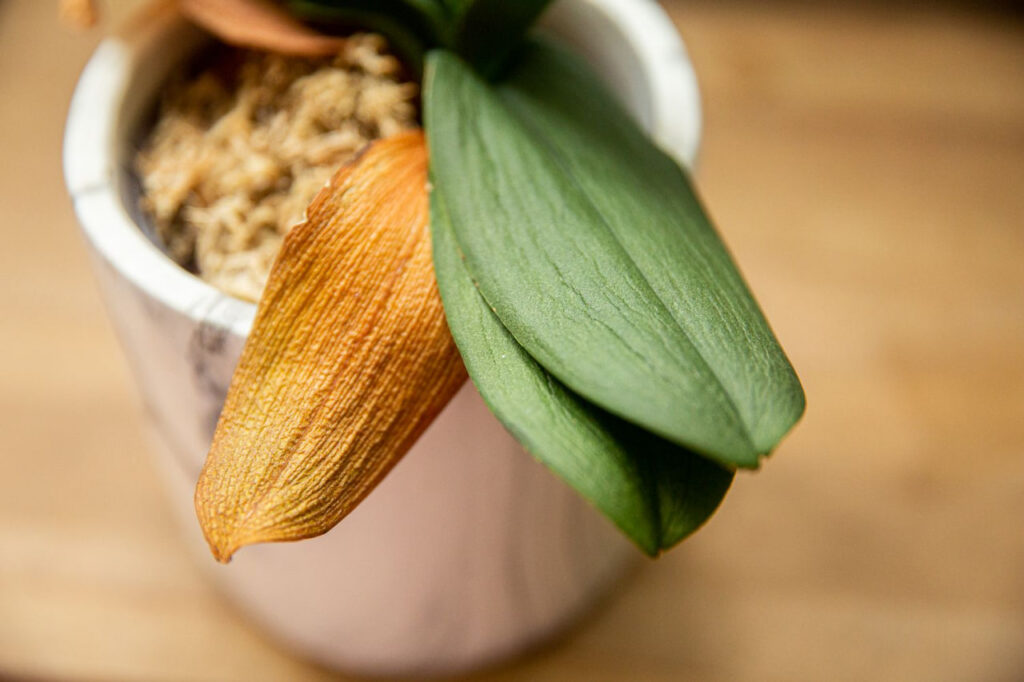
As an orchid grows older, its leaves gracefully retire and take on a lovely yellow hue before bidding farewell to the plant. This is a perfectly natural process of transition, and there is no need to fret. Your orchid is simply aging with grace!
Did you notice a yellow leaf on your orchid? No need to panic! This is just a natural stage in its life cycle and doesn’t necessarily mean that your plant is in danger. In fact, with proper orchid care, a new leaf will soon sprout up, replacing the old one. So sit back, relax, and enjoy watching your orchid continue to thrive.
How Can You Tell If Your Orchid’s Yellowing Leaves Are Natural?
Is your orchid looking a little worse for wear? Don’t panic – there are a few ways to determine whether those yellowing leaves are just a sign of aging, or if there’s something more sinister afoot. Start by investigating whether all of the leaves are affected, or just a select few – this will give you a clue as to what might be happening.
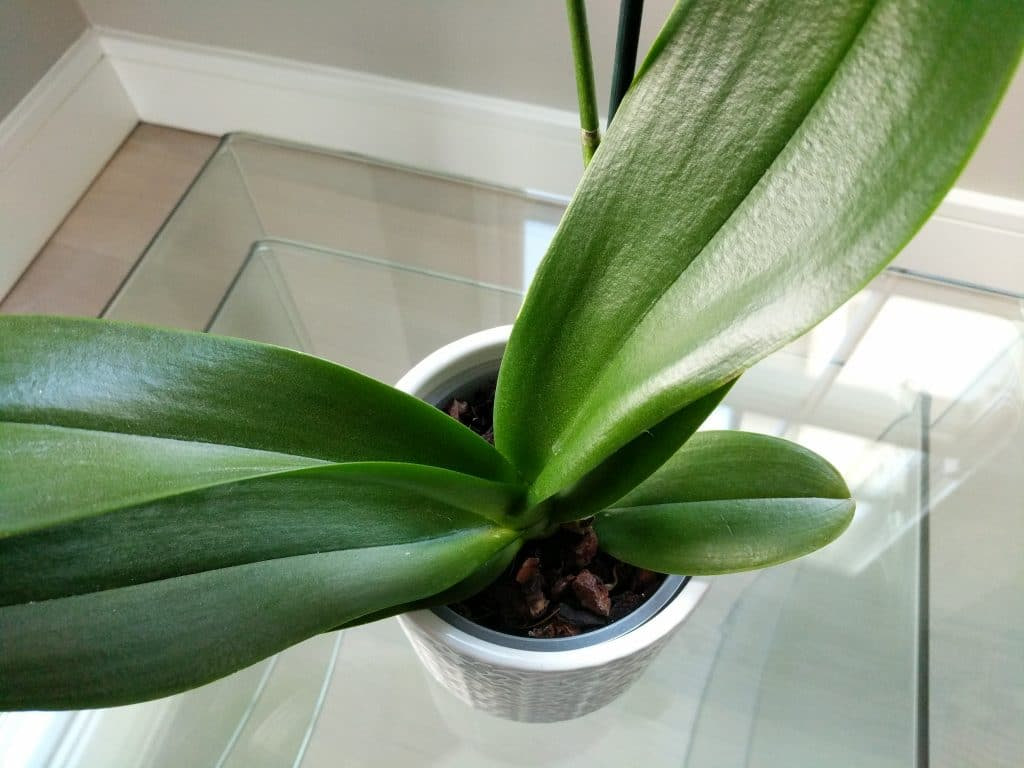
As you inspect your orchid, pay close attention to the fresh growth sprouting up. These brand-new leaves are the key to determining whether or not your plant is thriving. If they appear robust and vibrant, chances are that any fading or yellowing of older leaves is just a natural part of the plant’s life cycle.
Wondering if your beloved orchid is feeling under the weather? Take a deep breath and relax! To ensure your orchid is thriving, give it a once-over to gauge its overall health. If it’s flowering and looking generally fine, there’s no need to stress about yellowing leaves.
Overwatering
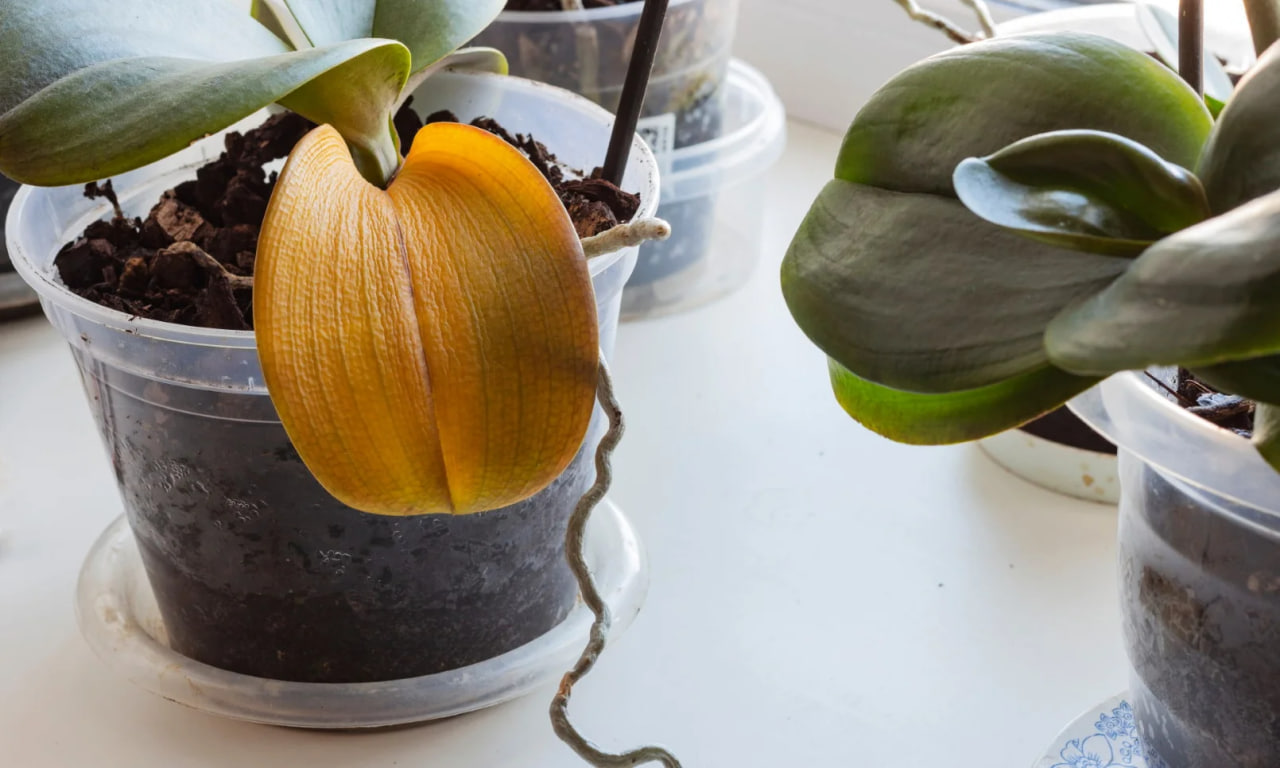
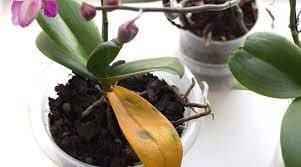
Your orchid’s yellow leaves may be due to an all-too-common issue – overwatering. These delicate beauties don’t do well with too much water, and the excess moisture can cause their once-beautiful leaves to take on a less-than-lovely shade of yellow before eventually falling off entirely. Plus, overwatering can spark root rot, a problem that spells disaster for any orchid. So, if you want to keep your plant’s vibrant greens intact, remember to take it easy on the watering can!
Got a droopy orchid? Check out its potting mix first! It might just be drowning in water. Spotting a slimy, moist mix is a telltale sign of overwatering, so give your orchid potting mix a break and let it dry out a bit.
Are you a plant parent struggling to keep your orchid alive? Look to the leaves for clues. If they appear limp or lifeless, your plant may be drowning. It’s not getting enough air, which is essential for the roots to absorb nutrients and water. A soggy environment can cause root rot, severely impairing their ability to function. As a result, your orchid’s leaves may become yellow and wilted, and eventually die off. Don’t let overwatering be the downfall of your beautiful orchid!
How to Fix Overwatering or Prevent It?
Looking to cure your orchid’s soggy sorrow? Here’s a top-notch tip – instead of drenching it constantly, try giving it a little drought. Allow its roots to recharge by drying out the soil completely before giving it another splash of hydration. Watch your wilting wonder come back to life in no time!
Orchids are serious water conservationists! These beautiful plants are epiphytes, which means they grow on trees rather than in soil. This unique growth habit allows orchids to breathe easy and avoid the perils of overwatering. When potted, orchids must have special soil that lets in plenty of oxygen, keeping the root structure strong and healthy. With this smart setup, excess water simply drains away, leaving your orchid to thrive and flourish.
Keep your orchid happy and hydrated by waiting for the potting soil to dry out before giving it a drink. When in doubt about watering, remember that under-watering is better than over-watering. So don’t overdo it – let your orchid dictate when it’s time for a refresh!
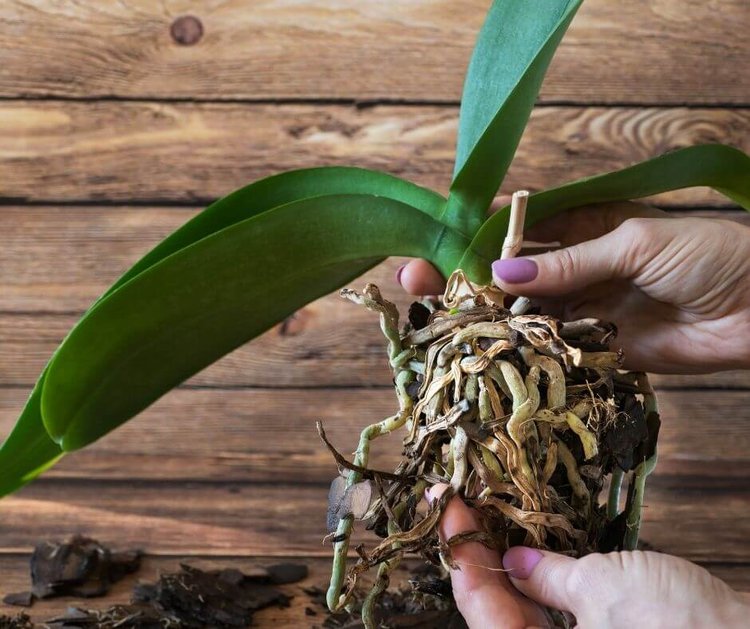
Is your beloved orchid struggling due to too much TLC? Root rot from overwatering can be the culprit. Fear not, for repotting in a special aerated potting medium can be the solution to this problem. First, though, carefully snip away any black or mushy roots. Then, you’ll be ready to place your plant in a mix that includes pine bark or an orchid-friendly formula. A few extra steps now can lead to happy blooms later!
Underwatering
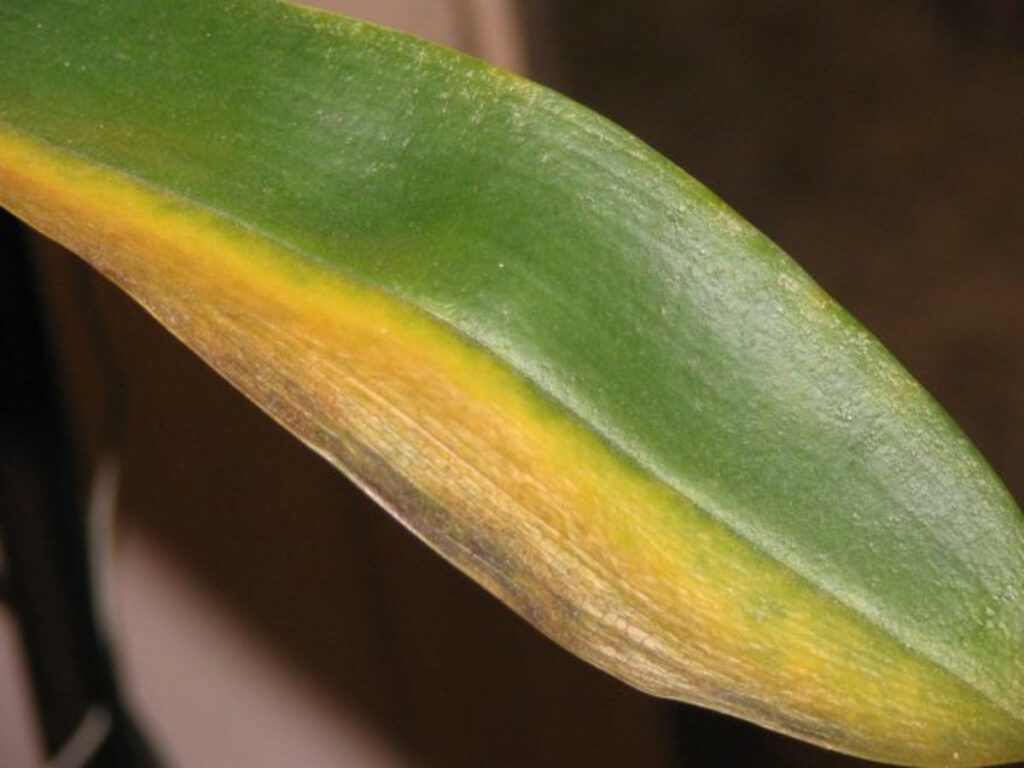
Are you a proud orchid owner but notice your plant turning yellow? Before you assume overwatering is the culprit, consider underwatering as a potential cause. While orchids don’t require frequent watering, they do need deep waterings so their healthy roots and can fully absorb necessary nutrients. When left underwatered, the once lush green leaves will turn yellow, shrivel, and ultimately fall off. The stems will also become weak and wilt, creating an unsightly and unhealthy appearance for your precious plant. So show your orchid some love with a proper deep watering to keep it thriving and green!
How to Fix or Prevent Underwatering?
Is your orchid feeling thirsty? Don’t neglect your green friend! Take a peek at its potting mix. If it’s only damp on the surface, your orchid is probably parched. To quench its thirst, aim for moist soil (not soggy, mind you!). With a little attention, your orchid will be blooming in no time!
Revive your droopy orchid by showering it with a deep watering! Say goodbye to underwatering and hello to lush, healthy blooms. Let your healthy orchid roots bask in the glory of its moisture and then give it some space to air out. A drier potting mix means happier roots and happier you. Keep up with this hydrating routine once a week, maybe even two, and watch your orchid prosper before your very eyes.
The delicate orchid needs some time to bounce back, so resist the urge to drown it with too much water. Show your green thumb prowess by exercising patience and letting nature work its magic. Rushing the process will only create a bigger mess, so take a deep breath and let the plant do its thing.
Read also: Healthy orchid roots
Too Much Direct Sunlight
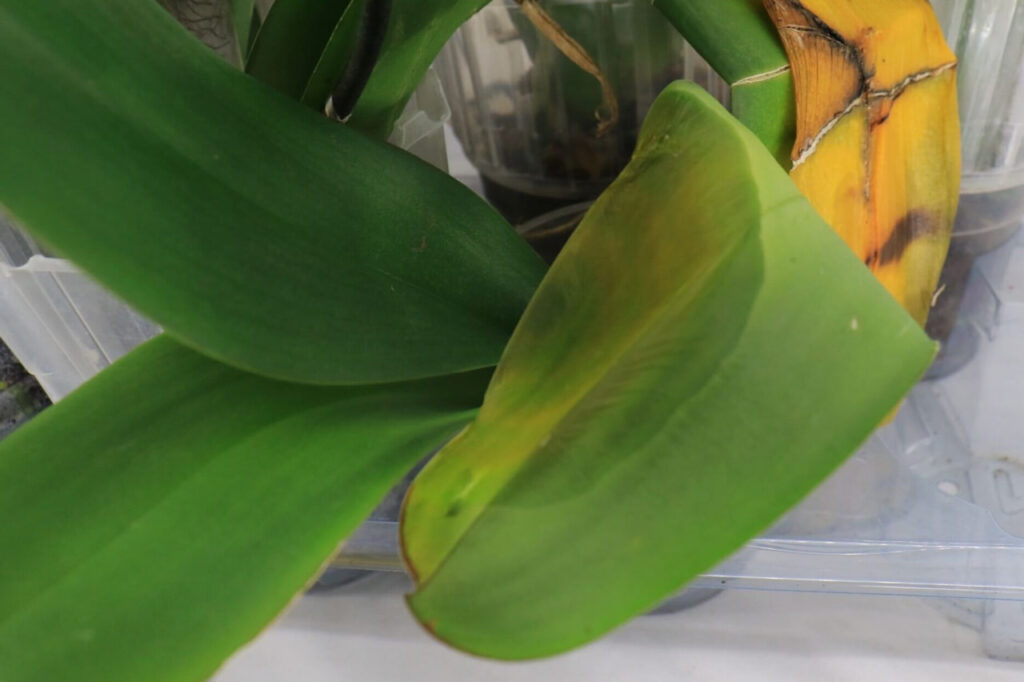
Give your delicate orchids the warmth and brightness they crave without risking scorched, yellowing leaves. Indirect sunlight will lead to thriving, healthy green roots and foliage, while too much direct light can spell disaster in the form of dry, crispy leaves with unsightly burn marks and a wilted appearance. Keep your orchids looking pristine by monitoring the amount of sunlight they receive, and never let them suffer the irreversible damage that comes from overexposure.
How to Fix or Prevent Too Much Direct Sunlight?
Give your orchid the perfect amount of shine by relocating it to a spot with rich and soft sunshine rather than facing direct sun.
Orchids, like fairies in the forest, prefer the magical dappled light that filters through the canopy. Direct sunlight, on the other hand, can be a harmful curse for these delicate beauties. If your orchid is basking in full sunlight for part of the day, it’s time to rescue it from its fiery fate – find a new home with indirect or filtered sunshine, and watch your little woodland sprite thrive.
Bring some shade and style to your orchid by draping a sheer curtain over it or placing it behind a chic piece of furniture. Shield it from the blazing sun and give it a stylish touch at the same time.
Temperature Stress
Experience the luxury of having vibrant greenery indoors with the delicate beauty of orchids. These tropical plants are absolute divas when it comes to temperatures, preferring the warmth of 60-75 degrees Fahrenheit. As challenging as they may be, orchids make the perfect houseplants, adding a touch of elegance to any room. But be warned, these sensitive blooms cannot withstand extreme heat nor cold – so make sure to keep them cozy and snug.
An orchid plant is a delicate beauty that thrives in a stable environment. But extreme temperature fluctuations can cause it to wither away and lose its charm. Imagine a warm, sunny day suddenly giving way to a chilly night – the shock alone can trigger yellow leaves to turn yellow on your orchid. And if the thermometer drops below 60 degrees, expect your orchid to look less than lively. But temperature isn’t the only culprit here. Even a few hours of erratic weather patterns can take a toll on your orchid’s blooming potential, causing its flowers to wilt or drop off altogether. So, keep a close eye on the climate, and give your orchid the care and love it needs to stay healthy and radiant.
How to Fix or Prevent Temperature Stress?
Is your orchid feeling the heat, or shivering in the cold? Don’t worry, we’ve got you covered. Simply shift your lovely plant to a new spot with the perfect temperature, and watch it thrive! No more stress for your orchid, and you get to enjoy its beauty all season long.
Give your orchids the cozy, consistent temperatures they crave! Instead of subjecting them to the unpredictable shifts of your home’s environment, find a cozy spot where they can thrive. If you’re not sure where to start, try placing them in a warm room with an east- or north-facing window for a plant paradise like no other.
Pin for later!
Humidity levels
The key to making orchids thrive is providing them with the perfect environment – one that’s not too hot, not too cold, and not too humid. While orchids love high humidity, too much of it can lead to unwanted mold growth and disease. Finding the balance is key, and with a little effort, you’ll have gorgeous blooms all year round.
Dry air is the enemy of orchids, causing their leaves to wither and fade. While you may love a cozy, warm home, your orchids require a more humid environment to thrive. Without proper moisture, these graceful beauties will wilt and suffer, leaving you with sad, yellowing leaves. Keep your orchids happy and healthy by ensuring they have the right amount of moisture in their air.
Discovering the precise humidity level for your orchids is a delicate dance of balance, with an ideal range of between 40-70%. Don’t underestimate the importance of finding that sweet spot for your precious plants.
How to Fix or Prevent Low Humidity?
Your orchid’s yellowing leaves may indicate low humidity, but don’t fret! There’s a simple solution – boost the humidity in the air surrounding your plant. Giving your orchid the proper moisture it needs will help keep it thriving and looking lush.
Turn your orchid’s frown upside down by giving it some humidity love – this simple act can relieve the plant’s stress and keep its leaves feeling fresh and green.
Transform Your Orchid’s Environment with a Pebble Tray and Water! Give your orchid the perfect amount of moisture it needs by simply placing it on top of a pebble tray filled with water. Allow the water to evaporate and fill the surrounding air with the humidity your orchid craves. Become a master of orchid care today!
Transforming Your Orchid’s Habitat: Boost Humidity with These Simple Tips
Monitoring humidity levels with a hygrometer is a clever way to get an accurate reading on the moisture levels in your home as well as your orchid’s environment.

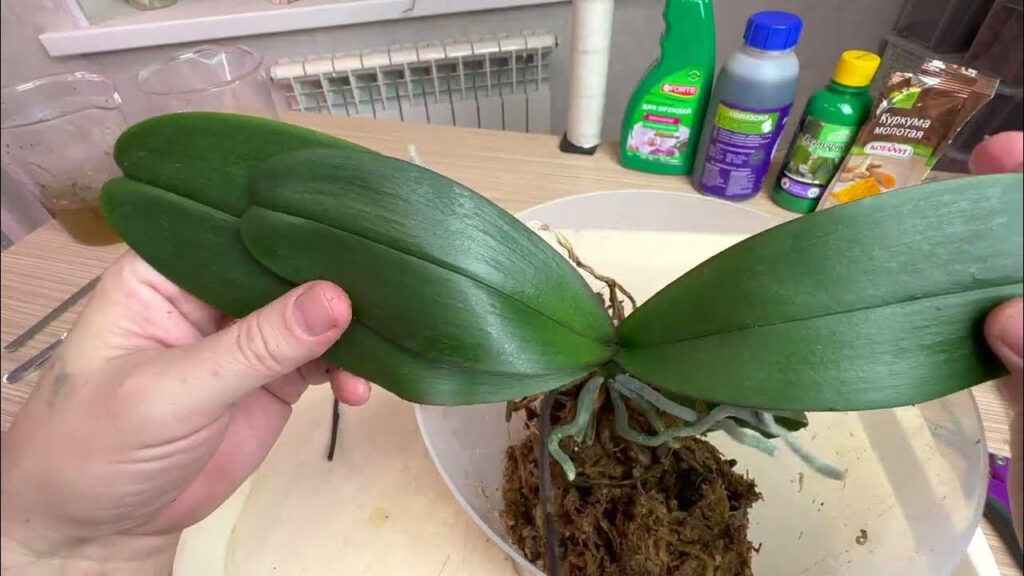
Too Much Fertilizer
Keeping orchids healthy requires careful fertilization. However, just like with any good thing in life, too much can be detrimental. Orchid owners need to be mindful of the amount of fertilizer they use, as it contains salts and chemicals that can accumulate in the soil and cause leaves to lose color and vibrancy. Finding the right balance is key to maintaining the beauty and vitality of these stunning flowers.
Common orchid care mistakes could have disastrous consequences for your plant. Overfertilization, in particular, can lead to root damage and cause unsightly yellowing of the leaves. Protect the health of your orchid by ensuring its roots are properly nourished without excessive fertilizing.
Caring for orchids can be a delicate task, as these stunning plants require a gentle touch. Unlike many other plants, they don’t crave an abundance of fertilizer to thrive in their environment.

How to Fix or Prevent Overfertilization?
Have you ever suspected that your orchid has been overfertilized? Worry not, there’s a solution! Simply flush the potting mix to clear out any excess fertilizer salts that may have built up. How? Just water your orchid until the water escapes through the drainage holes. Easy peasy, right? Give it a try and see the difference it can make for your beloved flower.
Give your orchid some breathing space by cutting back on fertilization and opting for a fertilizer tailored to their unique needs, for healthier and happier blooms.
Revitalize your orchid with a carefully crafted fertilizer mixture. Orchids are unique, low-maintenance plants that thrive on a lighter diet than most. Don’t overfeed your plant – a little goes a long way! It’s crucial to remember that timing is everything – avoid feeding your orchid once it’s already bloomed. Give your orchid the TLC it craves and watch it flourish.
If you want your orchid to thrive, always err on the side of caution when it comes to fertilizing. It’s better to be safe than sorry! Whether you’re a seasoned orchid grower or just starting out, make sure to carefully read the fertilizer label and abide by the recommended usage. This will ensure your beautiful blooms are healthy and happy for years to come.

Nutrient Deficiency
To achieve vibrant and stunning orchid plants all summer long, a constant source of nutrients is vital. Not only will it maintain the health and strength of the leaves, but it will also contribute to the production of mesmerizing blooms that will leave your garden guests in awe.
Just like us, orchids need a balanced diet to thrive. Without the right nutrients, they can start to look under the weather. If your orchid is yellowing or drooping, it may be time to check their nutrient levels. These elegant plants often crave manganese, zinc, iron, and nitrogen, so a little boost in these areas can go a long way in keeping them healthy and vibrant.
Unlock the secret to vibrant and healthy orchids! Without proper fertilization, these beautiful blooms will eventually appear lackluster and depleted. Don’t wait until it’s too late – choose a specialized orchid fertilizer and give your plants the nourishment they crave. Keep your orchids thriving with this simple yet crucial step.
How to Fix or Prevent a Nutrient Deficiency?
Do you feel like your orchid could use a little boost in its nutrition? Fear not – the solution lies in the power of fertilizer. Look for a formula that packs in all the essential nutrients your plant needs to flourish. Give your orchid the care it deserves and watch it thrive.
Enhance Your Orchid Game – Tips for Using Fertilizer Effectively
Are you an orchid enthusiast looking to achieve that perfect bloom? Look no further than your fertilizer routine. While it may seem like a simple task, using fertilizer correctly is crucial in maintaining your plant’s health. Remember to read and follow the label directions carefully, as each orchid specific fertilizer used is different. It’s also important to note that orchids don’t require as much fertilizer as other plants, as they are light feeders. So, give your orchids the nourishment they need without drowning them in fertilizer, and watch them flourish into beautiful blooms.
Potting Stress
Potting stress, one of the main culprits behind those yellowing orchid leaves. It’s like a wilting flower, dropping its petals in distress. Your precious plant needs care, attention, and a little bit of love to alleviate this issue. Let’s help it bloom again and banish those yellow healthy orchid leaves for good.
Orchids, like many of us, don’t like change. Repotting can turn their world upside down and leave them feeling stressed out and overwhelmed. The result? Yellow and brown leaves that are anything but the vibrant green we’re used to seeing. If you notice your orchid’s leaves turning yellow, it’s likely due to potting stress. So take some deep breaths, be patient, and give your orchid the TLC it needs to bounce back.
Orchids love a cozy home, but sometimes they get too comfortable and their roots start to feel the squeeze. When this happens, the poor petals can’t get all the hydration and nutrition they need, which can lead to some rather unsightly yellowing and browning.
If your orchid plant is sporting green and vibrant roots, let it be! Repotting isn’t necessary unless you notice the orchid roots are looking a little down in the dumps – dry, gray, or white. Keep that happy plant exactly where it is!
How to Fix or Prevent Potting Stress?
Orchids, like all plants, outgrow their homes and need to be relocated every few years. If you neglect this vital step, your plant may become potbound and suffer. To give your precious flower the best chance at thriving, it’s essential to choose a new pot that is only a smidge larger than its current home. By following these steps, your orchid will flourish and reward you with stunning blooms for years to come.
When it comes to watering orchids well, size really does matter– when it comes to the pot, that is. If you give your delicate bloom a pot that’s too big, you’re setting it up for instability and a hard time getting the water and nutrients it needs to thrive. Don’t let your orchids drown in an oversized home– choose wisely to let them blossom beautifully.
To ensure your orchid stays happy and healthy, make sure to use a well-draining potting mix with pine bark. And remember, no need to stress your plant unnecessarily with repotting too often. Give your orchid the TLC it needs when it needs it.
Diseases
Being a proud plant parent comes with its own set of challenges and worries. Orchids, in particular, are susceptible to certain diseases that can turn their leaves yellow and make them look sad and unhealthy. These diseases range from troublesome fungal leaf yellow spots, to pesky bacterial brown spots and the dreaded root rot. As a plant parent, it’s important to keep a close eye on your orchids to ensure they are healthy and thriving!
Fungal Leaf Spot
Orchids are beautiful plants, but they are not immune to diseases. One of the most common issues that they face is a fungal infection or leaf spot. This pesky problem is marked by the appearance of small dark spots on the undersides of the lower leaves. If left untreated, the spots can spread and cause the leaves to fade into a depressing yellow or brown hue. To keep your orchids in tip-top shape, it’s important to take action against fungal leaf spot as soon as you spot it!
Say goodbye to leaf spot once and for all! Simply pluck those pesky affected leaves and give them the boot. Don’t forget to also spritz your plant with a powerful fungicide to ensure those spots stay far, far away.
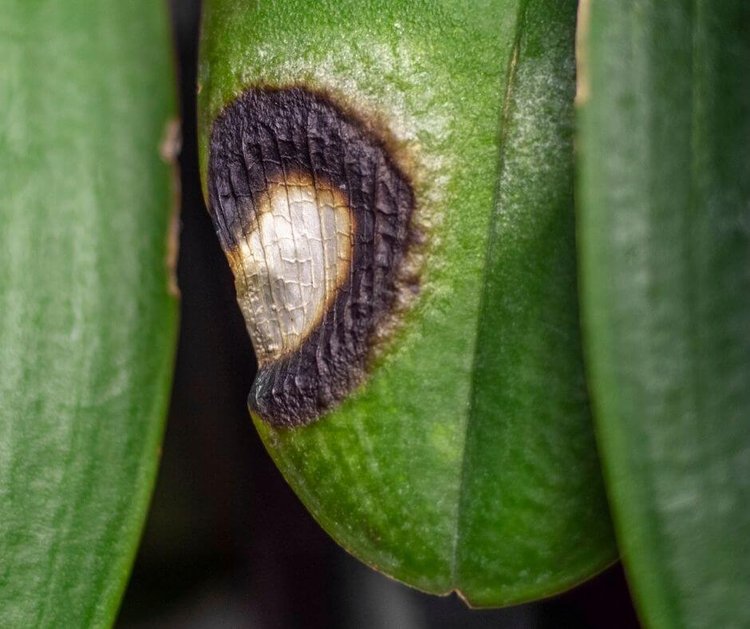
Bacterial Brown Spot
Orchids can fall prey to a sneaky little villain called bacterial brown spot. This mischievous disease is caused by a pesky bacterium named Acidovorax. Keep an eye out for any brown spots on your beloved orchids and fight back against this bacterial invader!
The insidious bacterial brown spot starts innocently enough with a small, watery brown dot on the leaf, but soon expands its malevolent reach until the entire leaf is discolored and lifeless. The cherry on top? It’ll eventually ooze a noxious brown liquid. Beware the telltale stench of bacterial brown rot – it’s easily recognizable and even less pleasant to encounter. And if that’s not enough to make your skin crawl, remember that if the disease reaches the rhizome, your precious orchid could be doomed.
Take down bacterial brown spot by targeting the root of the problem – the pesky bacteria causing the disease. The key is to say goodbye to all affected leaves and sterilize those pruning tools after each cut to keep those bacteria at bay. You’ll want to make sure your plant is getting a healthy air flow without too much moisture. Give those bacteria a run for their money and keep your plant healthy and happy!
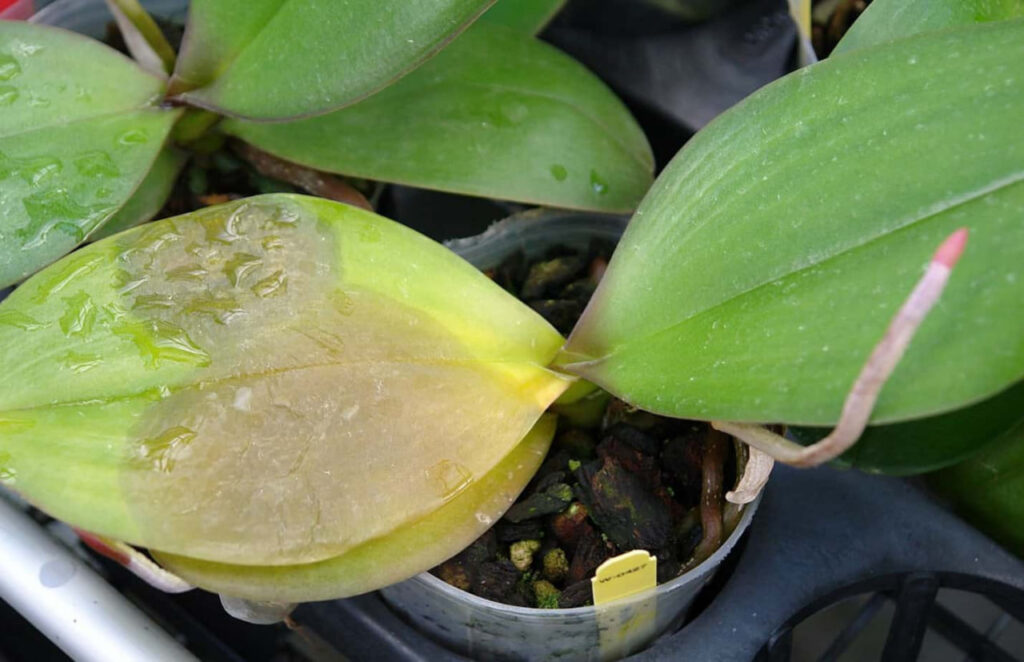
Root Rot
Orchid plants can suffer from a deadly condition known as root rot, which can ultimately lead to the plant’s demise. This unfortunate ailment arises when the roots of the plant begin to wither and die due to overhydration or subpar drainage. The real kicker is that when the roots go, the plant’s ability to absorb vital nutrients and water goes with it. The insidious symptoms include yellowing foliage, leaves that feel more like play dough than a plant, and a general sense of drooping and wilting. Don’t let this tragedy befall your beloved orchid – take extra care when watering and make sure your drainage game is on point.
Don’t let your plants fall victim to the dreaded root rot! To keep your green friends healthy, ensure proper drainage in their soil and resist the temptation to overwater them. If you do spot signs of root rot, don’t panic! Simply give your plant some TLC by carefully removing affected roots and repotting it in fresh, nutrient-rich soil. Keep your plants happy, and they’ll thank you with lush, thriving growth.
Pest Problems
The vibrant greenery of orchids can quickly turn to yellow hues due to pesky pests. Creeping critters like spider mites and mealybugs, as well as sneaky scale insects and thrips, can all wreak havoc on these delicate flowers if left unchecked. Keep an eye out for these uninvited guests to ensure your orchids stay healthy and happy.
Don’t let those tiny bugs fool you – detecting insect infestations can be a challenge. To keep your orchid plants happy and healthy, keep a watchful eye and inspect them regularly. The telltale sign of a pesky infestation? Bright yellow leaves. Stay diligent and beat those bugs at their own game!
Is your beloved orchid plant struggling with a pesky pest problem? Fear not, my friend! You can come to the rescue with the help of an insecticide. But hold tight, it’s important to handle it with care and follow the label instructions to ensure your plant gets the relief it needs. Let’s kick those creepy crawlies to the curb and restore your orchid to its natural glory!
Read also:
Can you fix orchid leaves turning yellow??
Do your precious orchid leaves resemble droopy bananas? Fear not! The key to getting your orchid back on track lies in playing detective. First things first: determine the root cause of these yellowing leaves. Once you’ve cracked the case, it’s time to take action and bid farewell to those unsightly banana-like leaves.
Should I cut yellow orchid leaves off?
Are the leaves on your orchid plant turning yellow? Don’t be tempted to grab the scissors just yet! Though it may seem like a good idea to prune away any unsightly foliage, doing so could actually harm your plant. Orchid leaves are key players in the process of photosynthesis, meaning they help your plant produce energy and grow. So before you reach for those pruners, remember that removing leaves could add unnecessary stress and even prove fatal for your beloved orchid.
Orchid leaves turning yellow because of the kind of water I am using?
Is your beloved orchid looking a little under the weather? The culprit might be your tap water! It turns out that those chemicals—like chlorine and fluoride—that make our water safe to drink can actually be harmful to our precious flowers. Don’t despair though! Simply switching to distilled or rainwater can revitalize those wilting leaves and bring your orchid back to its full, radiant glory.
Should you worry about yellowing orchid leaves?
Don’t turn a blind eye to your orchid’s yellowing leaves! They could be trying to signal that something’s amiss. Take a closer look at your beloved plant and play plant detective to identify the root cause. Once you’ve cracked the case, spring into action and nurse your orchid back to health. By paying attention and taking action, you’ll be rewarded with a flourishing and vibrant orchid.
Finding The Cause Of Orchid Leaves Turning Yellow
Is your orchid plant not looking quite as vibrant and perky as it once did? Have you noticed the leaves starting to turn yellow? Don’t panic, but it could be a sign that something is amiss. In fact, yellowing orchid leaves are commonly seen as an indicator that your plant is in need of a little TLC. Our team have scoured the internet to identify some of the top reasons for this phenomenon occurring, and we’re here to share our knowledge with you. No matter the cause, we’ve got tried and tested tips to get your orchid back on track and thriving as beautifully as ever.
Read more: Phalaenopsis blue orchid: Blue flower