
Mold on orchids? Any space can be made more cheerful by the lovely, delicate flowers known as orchids. They demand a lot from you, though, and you need to take extra care of them. One issue with orchids is mold, which can lead to the rot of the plant’s roots and its eventual death.
Strive to get rid of mold on orchid roots if you suspect your orchid has mold. Do something right away. The actions listed below will assist in removing mold from orchid roots and maintaining the health of your plant.
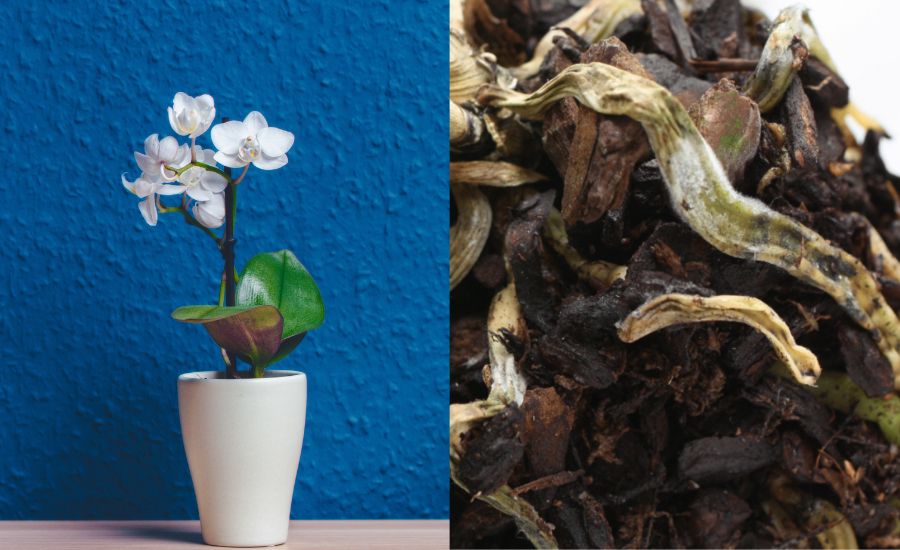
Blue mold on orchids
An unsettling issue that your orchids may struggle to handle is blue mold.
Causes
High humidity levels may be the root of this problem.
If you provide the orchids with excessive water, the blue fungus finds them more appealing to assault.
This problem eventually arises from continued overwatering, since it increases the spores’ ability to thrive in the bark.
Treatment
When treating them, it’s crucial to swap the old substrate for a new one. As a result, it will offer the plants fresh surroundings in which to grow. Additionally, you must water the plants sparingly in order to prevent having to deal with these circumstances over and over again.
Gray mold on orchids
Botrytis is the term used to describe gray mold. If you don’t take care of the plants beforehand, chances are it will have a negative impact on them.
Causes
It would be advantageous for gray mold to grow in your orchids if they had inadequate air circulation and moist conditions. The spores also frequently assault plants shortly after emerging from their wintering grounds in the decomposing plant matter.
Since they may begin attacking plants immediately after they reach them and do it in a matter of hours rather than days, they might prove extremely annoying. The winter wind may be responsible for spore circulation. Additionally, using infected gardening tools can cause this problem. The gray mold thrives in environments with high humidity, damp leaves, and cooler temperatures.
Symptoms
Small brown dots that typically appear on the petals and sepals of the flowers can serve to identify gray mold on plants. Additionally, you could notice spots of discoloration on the leaves in tan and gray colors. As the disease worsens, the spots continue to spread in a similar direction and toward one another.
In the end, the plants have the appearance of gray mass growth. Additionally, from a botanical perspective, it causes tissue collapse as well.
Treatment
Remember that you need to maintain the lowest possible humidity level. Additionally, always maintain a low level of moisture on the surfaces of the leaves. Finally, make sure that there is adequate airflow for the orchids. These circumstances will reduce the possibility of gray mold developing at all.
Always attempt to water the plants in the morning, as that is when they need to be watered the most. In this manner, the water is given enough time to quickly evaporate. Additionally, when planting many orchids, you must do so by using a method that allows for optimum air circulation for the plants.
Additionally, I advise applying fungicides to the diseased plants. In addition, you can cut off the diseased plant sections and strive to create the ideal growing conditions so that the plants become a bit drier. Gray mold removal won’t be difficult if you adhere to these recommendations.
Sooty mold on orchids
If you notice any black patches on your orchids, that is a clear indication that sooty mold is the cause of the problem. Determining where the sooty mold originates could prove fairly difficult. The mold variety known as sooty mold typically grows in the secretions left behind by scale, aphid, and mealybug infestations.
Once within the plant, these bugs secrete substances that eventually cover the leaf surface. Then, the plants resume their process of reproduction while the sooty mold seeks to infiltrate them.
Causes
The development of sooty mold may be caused by pests that secrete honeydew.
Symptoms
The indications of sooty mold tend to appear, as the name implies, where your affected plants are displaying dirty black soot on plant twigs as well as on the leaves. One can assume that someone has scattered ashes on your orchids or brought them nearer to the fire if they exhibit this ailment.
Additionally, when these plants have been attacked by this pest, they become more vulnerable to future attacks by pests.
Treatment
In order to get rid of the sooty mold, its origin must be addressed. Sooty mold is inclined to flourish on the honeydew that pests like aphids, mealy bugs, and scales produce. Therefore, you must determine which pests have infested your plants and act quickly to eliminate them.
Rinsing the plant’s leaves, stems, and branches will help you quickly eliminate the sooty mold once the pest issue has been resolved. Additionally, you can use neem oil, which is a powerful method for getting rid of both the pest issue and fungal infection.
It is not toxic to mammals or beneficial insects.
It is quite unlikely that sooty mold causes a fatal effect on plants, so it is not a severe problem. Nonetheless, it may have devastating consequences for the plants if its underlying source is not addressed.
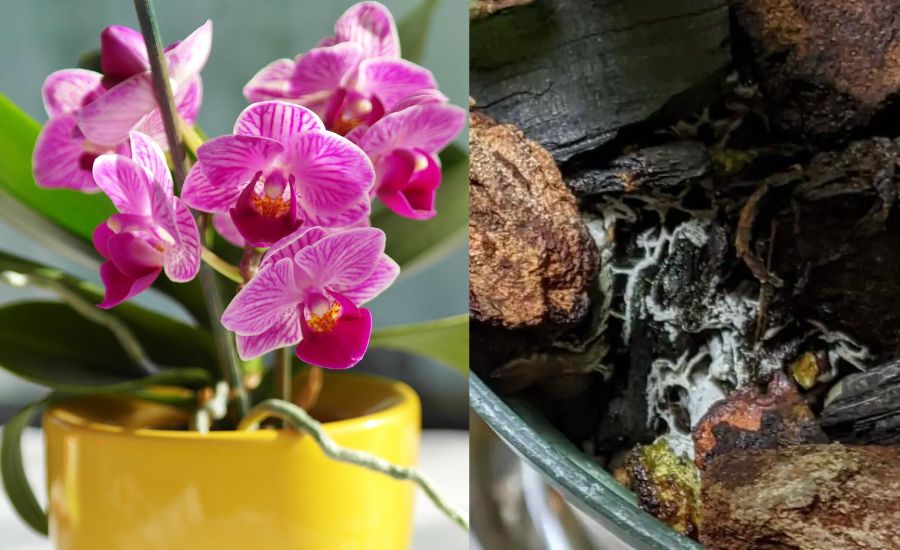
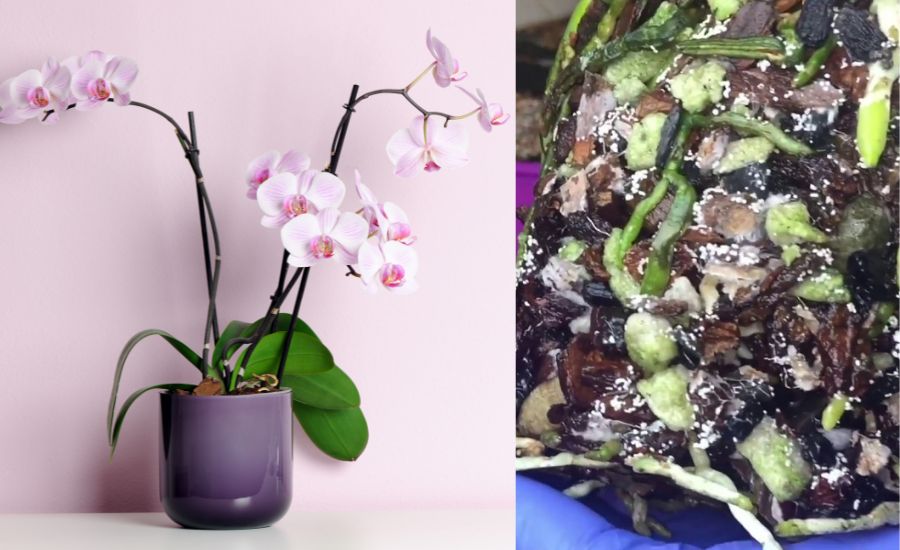
Snow mold on orchids
Another issue that frequently affects orchids is snow mold. This unpleasant disease is something that all orchid enthusiasts detest. The orchid fungus that initially attacks the potting medium before moving on to the orchid roots is the main culprit behind the snow mold.
It can hinder the plant’s ability to absorb water if it attacks the orchid’s roots. In practical terms, orchid mold is a fungus that repels water.
Additionally, there is a possibility that you can occasionally be misled while diagnosing snow mold and mistake it for a mealybug infestation because mealybugs also frequently resemble white growths on plants.
For more information, consider that mealybugs exude a white waxy substance that has the appearance of a white fungus. Mealy bugs often eat the whole plant, but snow mold frequently grows in potting mediums.
Causes of orchid mold
This issue could be exacerbated if the potting mixture is not sanitary. Orchid snow mold likes to reside in the decomposing potting medium. Additionally, if you notice snow mold on your plants, you have likely overwatered them. In general, using a non-sterile soil mixture results in this state.
Symptoms of orchid mold
A white, powdery development in your potting media is the first sign of orchid snow mold. Ptychogaster sp. or white mold, is responsible for this illness. As the orchid mold infection grows, it permeates through the potting soil and eventually starts to grow out of the holes at the bases of the pots.
Typically, orchid mold wouldn’t be reliant on the plants. Most often, it prefers to flourish on the dead, decomposing things in the potting soil. When your orchids experience this disease, it negatively impacts their ability to grow quickly. In the end, the plants can even die as a result. Additionally, as this develops on a large scale, it extends several inches past the base of the plants.
Treatment of orchid mold
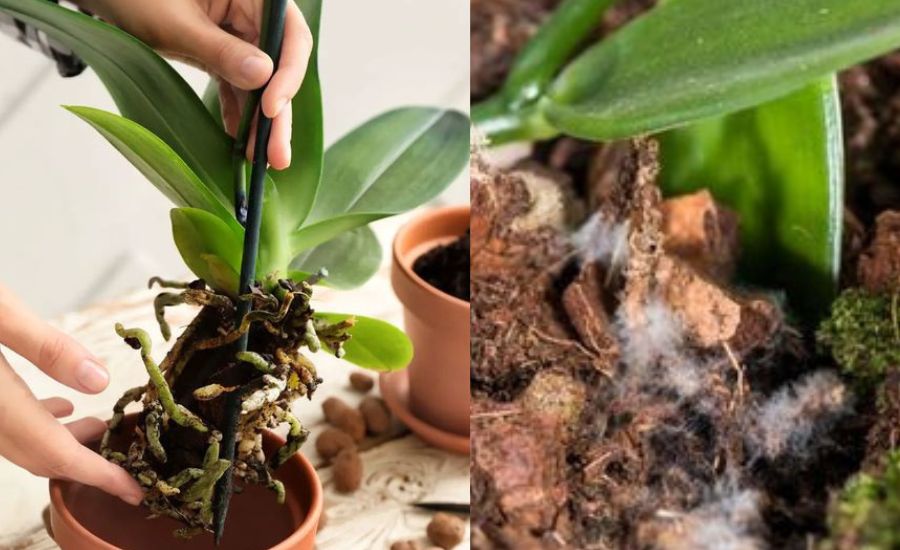
Repotting the infected plants is an excellent technique to treat orchids that have orchid mold. Overwatering is a contributing factor to orchid mold, as stated previously. As a result, you must reduce watering as soon as you see that your orchids have orchid mold.
To solve this issue, apply fungicides to the infected roots, rhizomes, and pseudobulbs. Although I advise employing a fungicide that comprises components such as alkyl dimethyl benzyl ammonium chloride because it is more successful in defeating white mold. This aids in getting rid of the orchid mold; I advise you to do it twice weekly.
How to prevent orchid fungus
It is certainly preferable to avoid disease altogether than to wait until there is an issue before taking action. Below are a few recommendations for preventing mold on orchid roots, orchid bark, and orchid leaves. By implementing the following techniques, you can lessen the likelihood of orchid fungus infestations.
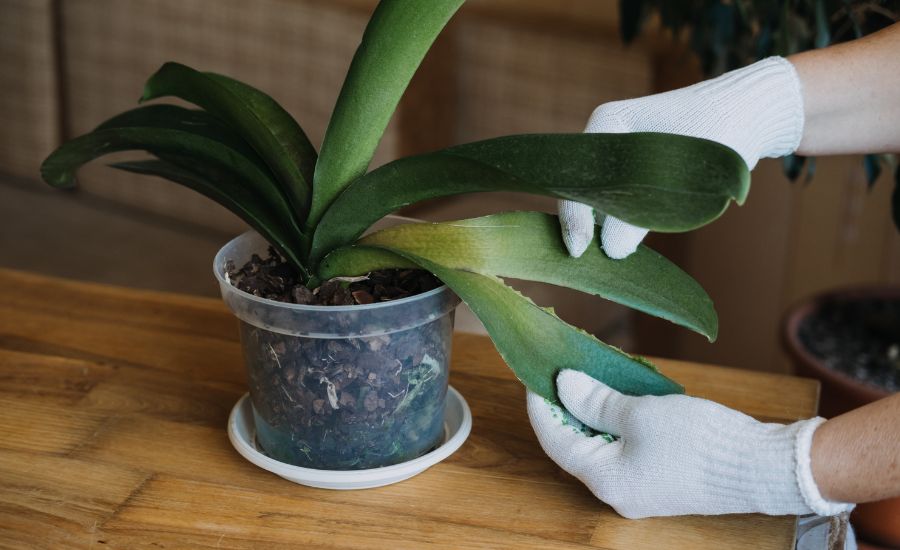
Frequently check on all of your plants: Put your orchid plants in clear plastic potting media. With these, you can quickly look for indications of problems with orchid roots and potting media soil. Frequently, it’s also worthwhile to look along the stem, in the crown, and under orchid leaves.
With the help of this, you’ll be able to identify crown or orchid bark rot quickly and begin treatment.
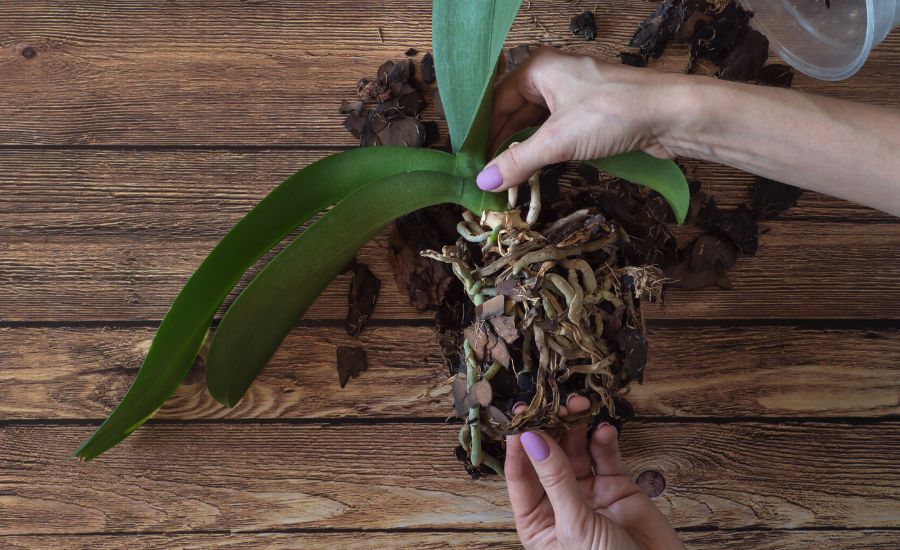
Dispose of dead orchid roots and leaves: When repotting your orchids, be certain to get rid of any dead roots that could support the growth of mildew and fungus. Maintaining an orchid requires regular removal of dead leaves and wilted flowers, as opposed to allowing them to accumulate on the plant or in the orchid pot.
Any organic debris that is degrading attracts orchid fungus and mold, which automatically develop around your orchids.
Maintain proper ventilation in the room: Be certain that the room where your orchids are kept is not completely enclosed. Rather, use a circulating fan or open a few windows to let in some fresh air. Standing water has a harder time evaporating when there is inadequate ventilation. Additionally, it makes it simpler for mold spores to spread throughout the plants and flourish.
Follow an appropriate watering schedule: Refrain from giving your orchids too much water. Mold and fungus flourish in damp conditions. Rather, wait until the potting medium is almost completely dry before watering it. This reduces the possibility of mold and orchid fungal infections.
Swap out old potting media: mold and fungus flourish in decaying potting soil. When it begins to deteriorate and decompose, particularly when it begins to smell terrible, it is preferable to replace it.
Ensure adequate aeration for your orchid: To accomplish this, drill ventilation holes into the pot. There are clear orchid pots that come with holes already drilled.
Potting medium for orchids
Your orchids can be grown in an environment called an orchid potting media. The overall category of potting media is merely one of many. The following particular kinds are appropriate for orchids:
- Orchid bark: Orchid bark promotes healthy root ventilation
- Coconut husk: helps absorb extra water
- Perlite: Excellent for aeration, and also aids in root water retention
- Charcoal: eliminates contaminants from the medium itself
- Sphagnum moss: Sphagnum moss helps to retain moisture
- Cinder: improves airflow for the roots
- Tree fern: improves air circulation and moisture absorption
One advantage of growing orchids in a Sphagnum moss orchid pot is that they require less watering and there is less chance of mold growing on the roots.
Why is potting media essential?
Finding the proper growing media is essential since it gives orchids the ideal environment to grow quickly. In contrast to the specially formulated orchid potting mixes, the standard soil mix doesn’t contain compost-decomposing material.
That’s why you should avoid utilizing it.
Additionally, it’s crucial that the chosen soil mixture has sufficient air circulation so that the roots may breathe.
FAQ
How do you treat mold on orchids?
Sterilize your workspace and your equipment: A pail of water should contain a 10% bleach solution. Then, fill a tiny spray bottle with the mixture. Use the diluted bleach solution to sterilize all of your cutting equipment and work surfaces. Additionally, you can clean the pot you’ll be using to repot your orchid with the bleach solution.
Remove the diseased roots: The decayed roots can be cut out using gardening shears or sterile scissors. You might need to remove the infected portion and some healthy orchid roots as well. You can stop the infection from spreading by doing this.
Disinfect the potting medium: If the new potting medium is not already cleaned and prepared for use, you must perform this procedure. The old potting medium must first be sterilized using a bleach solution if it is to be used again. Before repotting the orchid, be careful to properly rinse and dry it.
Unpot the orchid with care: Check that the old medium is contained. To readily dispose of garbage as needed, it is recommended to employ a plastic bag or liner.
Natural method
You must first prepare 3% hydrogen peroxide, 70% isopropyl alcohol, an 8-ounce spray container, and a new orchid medium. The following steps may be used to get rid of the mold. The orchids’ pots should be removed to begin. Squeezing the inner pot will do this, releasing the roots from the pot’s sidewalls.
Next, gently remove the plant from its pot. Following that, look at the plants and their roots. Given that the soil mixture is tainted, I advise emptying the pot. The potting soil can then be disposed of since you can no longer utilize it.
You must sanitize the workspace in the meantime. You could use 70% isopropyl alcohol to accomplish that. Additionally, remember to fully sanitize the pots before using them. Then, it is preferable if you could also disinfect your orchids. You can spray hydrogen peroxide on the orchids to disinfect them by filling a spray bottle with it.
Having said that, avoid spraying other plants’ roots with hydrogen peroxide because, if you do so unintentionally, it could harm the velamen. Give the plants five minutes to disinfect. If you want this treatment to work, keep using it.
Ultimately, you might think about repotting the plants after transplanting them. Keep in mind that you must maintain a dry leaf condition to avoid experiencing orchid fungus problems again.
Can I save a moldy orchid?
Your orchid can be revived if you are persistent, because it may take a while for it to recover if it only has leaves and no roots. Sometimes rooting hormones are useful. However, the main thing that pays off when you use the wait-and-see strategy is your patience and persistence.
An orchid without leaves, on the other hand, is probably already dead because it can’t produce enough to sustain itself. The most frequent cause of an orchid dying too soon is overwatering, which causes root rot. Once the roots are gone, the plant can no longer retain moisture, and as a result, it perishes.
It’s unlikely that an orchid can be saved if all of its roots are rotted and there are no more viable ones. Overwatering your orchid frequently causes this. Nevertheless, if it still has some healthy roots, you may re-pot those to revive your plant and get rid of the unhealthy ones.
Why is mold growing on my orchid?
Due to a multitude of causes, mold can develop on orchid roots. Several prerequisites of mold growth on orchid roots are listed below:
• Overwatering
The water should swiftly drain away after watering your orchid. Slow water drainage can lead to water pooling around the roots, which can eventually trigger root rot.
• Very damp potting medium
Root rot and mold might also result from planting your orchid in a potting medium that fails to drain adequately.
• Insufficient light
For optimal health, orchids require light. The roots may begin to decay, and the leaves may begin to turn yellow if they don’t receive enough light. The decaying roots can then develop mold.
• Inadequate airflow
Healthy orchid plants require adequate airflow to survive. The roots of your orchid may decay, and mold may grow if the air surrounding it is stagnant.
• Old potting medium
The potting medium may deteriorate and get compacted over time. Poor drainage and root rotting may result from this. Mold may subsequently develop on the rotting roots.
• Excessive light
Additionally, orchids might suffer from excessive light. The roots may begin to rot, the leaves may begin to burn, and mold may develop on the rotting roots.
• Crowded roots
Orchids require space to expand. Overcrowding of the roots might result in inadequate airflow and root rot. The decaying roots can then develop mold.
• Changes in temperature
Between 60 and 85 degrees Fahrenheit is the ideal temperature range for orchids. An orchid plant may become stressed if the temperature varies too much, which can lead to the rot of the roots and the subsequent growth of mold on them.
What is the black mold on my orchids?
A condition that is frequently seen and has a tendency to seem like black dots is black mold. The leaves of your plants are especially susceptible to black mold damage, which can affect practically every part of them. The orchids develop black rot as a result of black mold. In practical terms, black rot is just another name for black mold.
It should be noted that black rot is a fatal disease, and the best course of action is to completely destroy the plants to prevent the disease from spreading to the remaining healthy plants. As soon as you notice your orchids experiencing this disease, you must isolate the afflicted plants.
Symptoms
When they have this ailment, you can tell because the leaves start to turn yellow. Once they have spread even further, the leaves get sizable black spots as a result. The darkening of the plant’s stems and roots also increases with the growth of the black mold. Black mold can be fatal to plants if it comes into contact with seedlings.
Causes
Numerous factors could contribute to this illness. Examples of them include contamination from other plants, the use of unsterilized potting mediums, contamination from poor watering techniques, and inadequate air circulation.
Treatment
If you choose to continue growing the plants even though they have black mold symptoms, you must first cut off the affected portions. This approach can come across as harsh. This crucial step must be taken, nevertheless, if you want to ensure that the orchids have the smallest chance of surviving.
Additionally, it will assist you in safeguarding healthy plant components. Nevertheless, you must first ensure that all the equipment you’ll be utilizing is sterile before you start the cuttings. Moreover, it’s crucial that you sterilize the workspace. After treating the plants, throw away all of their remains. Infected plant components should ideally be sealed in a plastic bag before being disposed of completely.
Avoid putting them in proximity to healthy plants and your orchid collection. You can also use ground cinnamon to cure plants that have black mold on them. You can gently sprinkle ground cinnamon, a natural fungicide, on the orchids’ cut surfaces. This assists in preventing further spread among the plants.
Black mold can be effectively managed by repotting the plants with new potting media. The plants get fresh growing conditions once you have replaced the old soil mixture with the new soil mixture. Make sure to use a new, sterilized orchid pot, though. Isolating the impacted plant is essential, and you should do it as well.
Conclusion
Make a strategy to keep your orchids happy and healthy. The best approach to combating fungal diseases is to avoid them in the first place. The orchid fungus can be removed by using certain methods. The majority of them are all-natural and completely harmless to your orchid.
If you’re positive your orchid has a pest or fungal infestation, you can use the majority of these treatments. Every single procedure is quite simple to perform and reasonably priced. The health of your orchid will noticeably improve after just a couple of treatments using each of these techniques. I hope this article on mold in orchids is of great help.