
Wilting leaves on an orchid can be a worrying sight. Orchids are delicate plants, and their care requirements can often seem like a daunting task to the hobbyist grower. Orchids may experience orchids wilting leaves due to various causes, including insufficient light, incorrect watering schedules, and nutrient deficiencies.
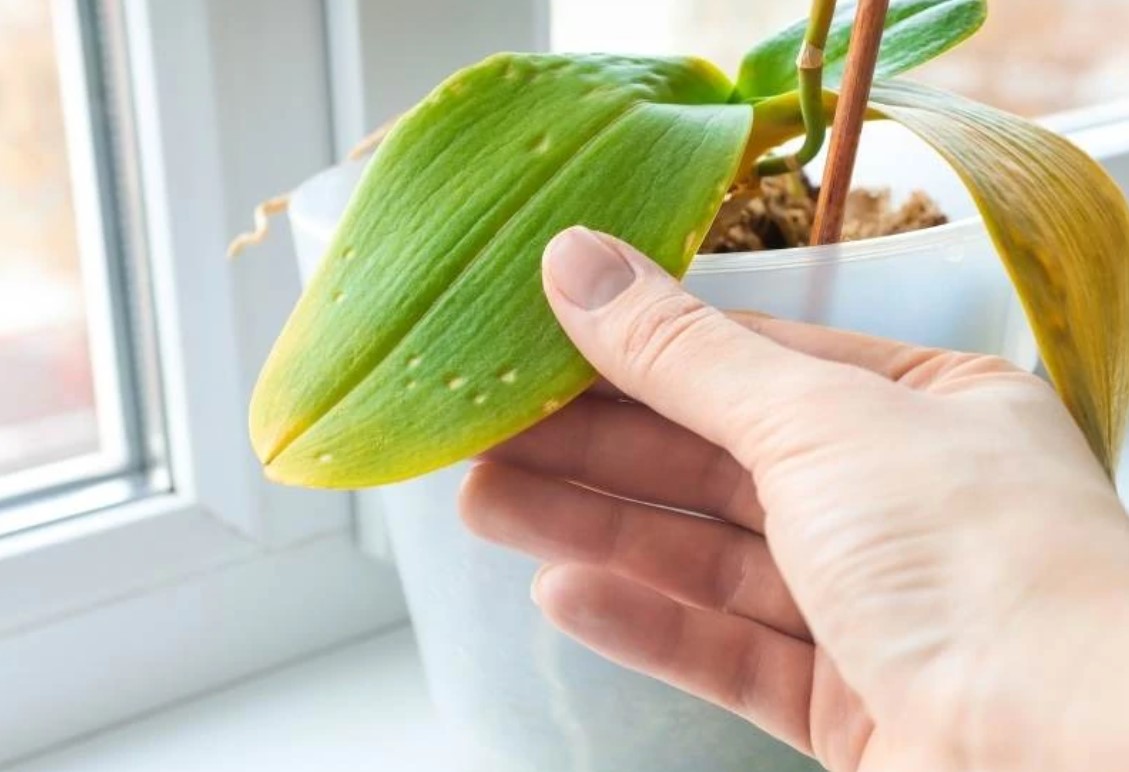
A sign that your orchid may be suffering from too little light is yellowing leaves. Orchids need access to bright, indirect light for at least a few hours each day in order for them to thrive. Without proper lighting, the plant will struggle to photosynthesize and absorb the necessary nutrients it needs to stay healthy.
Causes of Droopy Orchid Leaves
Droopy and wrinkly leaves on Phalaenopsis orchids is a common issue that can be caused by a few different problems. In the majority of cases, however, the cause is improper moisture levels. This can happen if your orchid is kept too dry OR too wet.
If your orchid is kept too dry, the leaves will become wrinkled and droopy because they are unable to absorb enough moisture. On the other hand, if your orchid is kept too wet, the roots won’t be able to take up oxygen from the soil, leading to a lack of moisture in the leaves which can also cause them to become droopy and wrinkled.
Reviving an Overwatered Orchid
Reviving an overwatered orchid is a process that requires patience and dedication, but with a few simple steps, you can restore your orchid to its beautiful blooming best.
The first step to reviving your overwatered orchid is to clean up the rot in its root system. If the plant is in a small pot, you can keep it in the same size pot. If not, you’ll need to transfer your orchid into a smaller pot. Your orchid will also need to be repotted with fresh soil and placed in an area that allows for plenty of air circulation.
To help ensure that your orchid’s roots don’t get overwatered again, it’s important to create a potting mix that can adequately hold and drain water. A good mixture for an overwatered orchid is 2 parts potting mix, 1 part perlite, and 1 part bark. To learn more about the repotting process in detail, you can refer to my Illustrated Guide on How to Repot.
2 Quick Tips to Make Sure You Have the Right Growing Climate
Potting Soil and Pot Sizes Influence the Watering Frequency Required
Watering frequency for orchids is something that must be tailored for each and every variety. Pot size is one of the biggest factors in determining how often an orchid should be watered. Due to their large root systems, orchids require bigger pots than other plants, which allows the soil to stay moist longer. If an orchid is planted in a pot that is too small, it will dry out quickly and require more frequent watering.
Potting soil also has an impact on the frequency at which orchids should be watered. Potting soils designed for orchids typically contain fir bark, perlite and sphagnum moss, but the ratios of these materials can vary, affecting how long the soil takes to dry out. Therefore, it is important to adjust the watering frequency according to the particular soil your orchid is planted in.
Ultimately, with trial and error you can find the right balance of pot size and potting soil that works for your orchid. Most plant guides will provide a baseline of when to water, such as every few days and more in the summer, but it is up to you to adjust this according to your own circumstances.
Potting soil for orchids is never straight forward, but with a bit of research and experimentation you can find the best setup for your orchid’s needs. Pot size and potting soil both influence the watering frequency required, so it is important to keep these things in mind when caring for orchid plants.
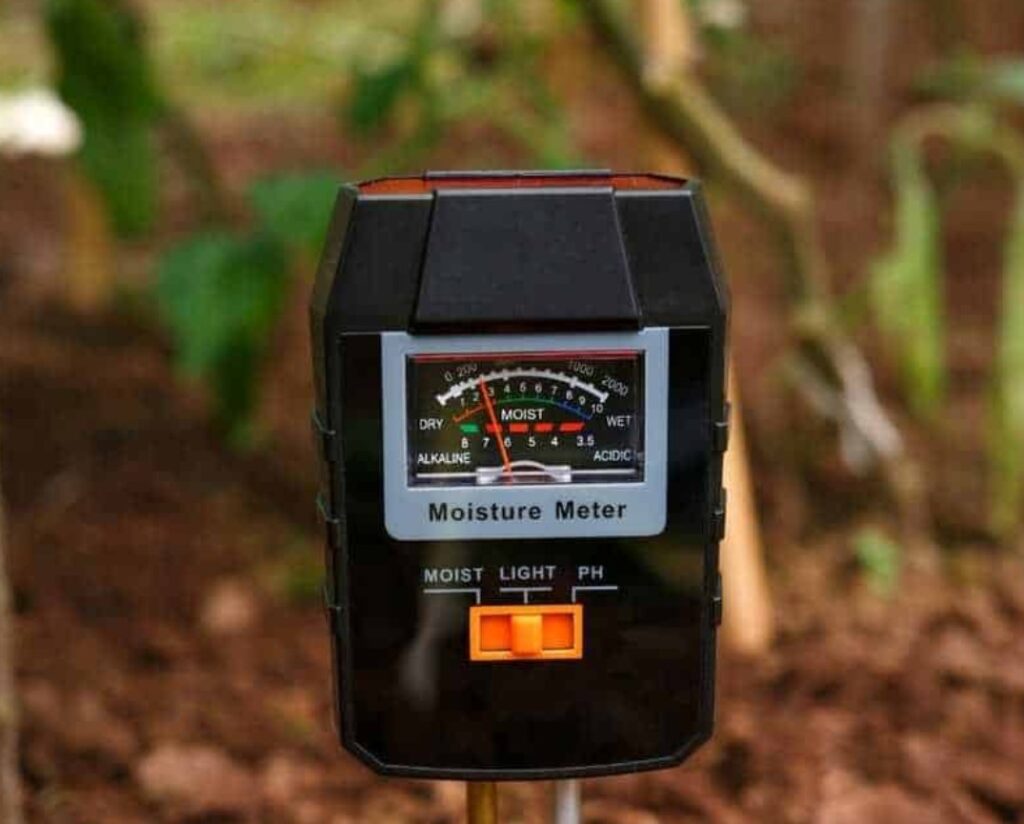
Check the pH of Your Potting Soil
It is important to regularly check the pH of your potting soil when growing orchids in order to ensure that it is within the recommended range of 5.5 to 6.5. This helps the plant get all the nutrients it needs from the soil in order for it to thrive and flower properly. Fresh mixes are usually within this range, but as the soil ages, the organic matter in an orchid potting mix will start to deteriorate over time. This can cause the acidity of the soil to decrease and make it more difficult for your plants to get the nutrients they need.
Adding sphagnum moss is an ideal way to increase the acidity of your soil and bring it within the recommended range. Sphagnum moss has a pH of 4.4 on the pH scale, so adding small amounts of sphagnum moss to your potting mix can help raise the acidity and get your soil back in balance.
To Fix an Orchid with Wilting Leaves, Start with the Roots
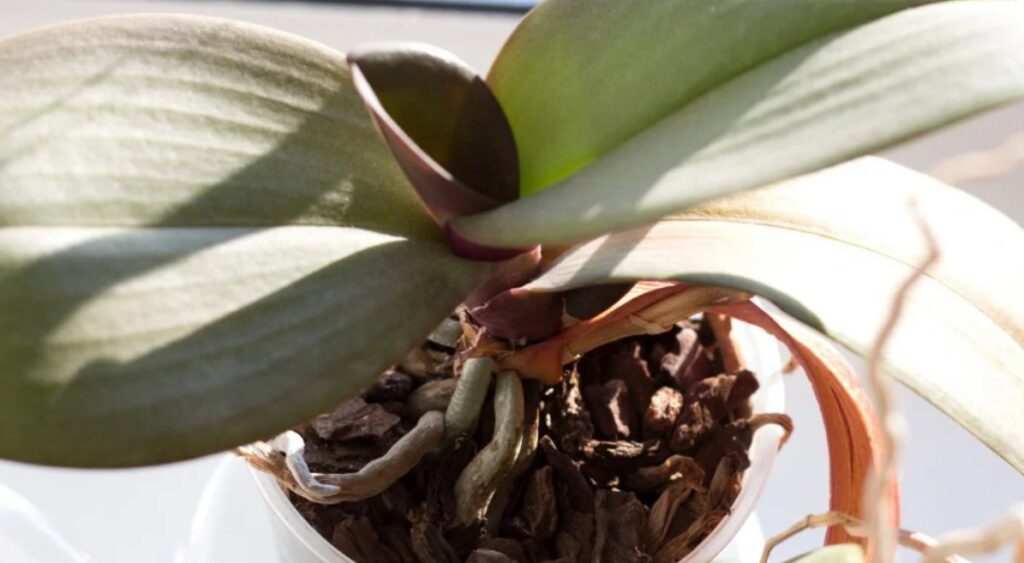
Fixing an orchid with wilting leaves starts with the roots. To determine if your plant is getting enough nutrients, inspect the roots to ensure they are firm and white in color. To do this, you can carefully remove the orchid from the pot to check its root system.
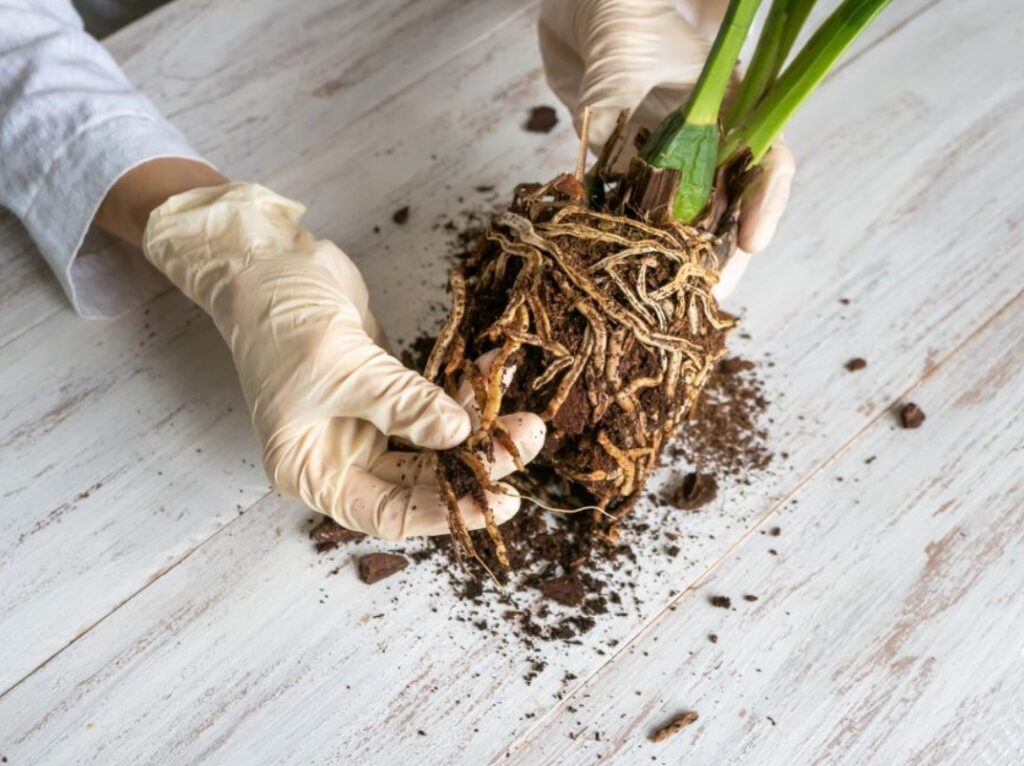
Once you have determined the root system is healthy, it may be time to check the soil. To do this, take a sample of the soil from your plant and squeeze it between your fingers. If the soil stays clumped together after you let go, then it is still retaining moisture and there’s probably no need to water the plant further.
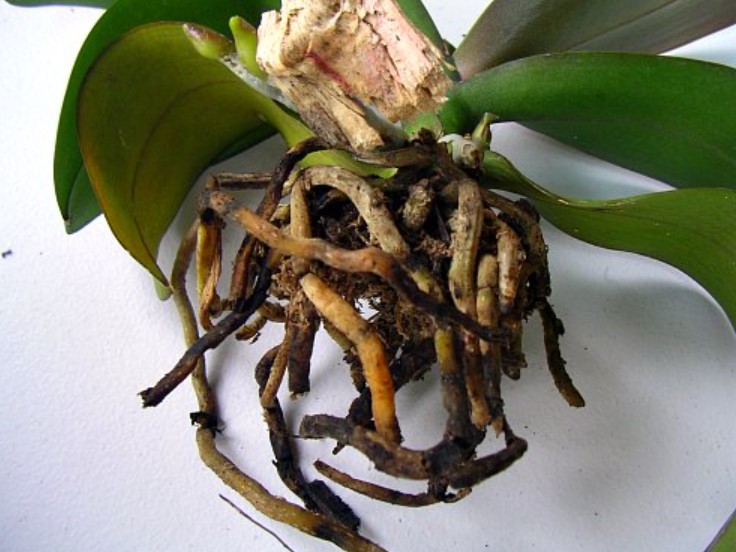
Removing Damaged Orchid Roots
Removing damaged orchid roots is an essential task for keeping your orchid healthy and preventing root rot. Root rot, which can be caused by fungus, is easily spotted on an orchid that has wilting leaves, with the dark brown color and mushy feel of the roots indicating they are dead or dying. Removing these roots is best done one at a time, and it’s important to wear gloves and sterilize your pruners between each snip. This ensures that any fungus or bacteria is not spread from one root to another.
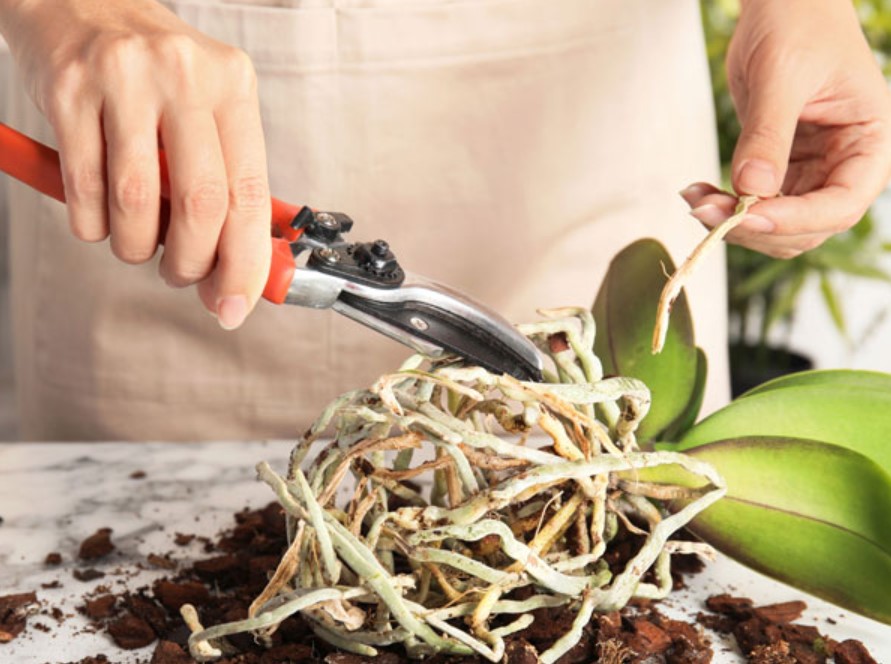
After making each cut, let the pruners air dry before continuing with the next root. Properly sterilizing equipment is key for keeping your orchid healthy and safe from further damage. Removing damaged roots is a critical step for maintaining your plant’s health and ensuring it looks its best. With the right care and attention, your orchid will continue to thrive and provide you with beautiful blooms for years to come.
Repotting Orchids in Suitable Containers and Potting Mix
Repotting orchids in suitable containers and potting mix is essential to help ensure the best health of your plants. When choosing a planter, ensure it mimics the conditions that orchids would naturally experience in their natural environment. The bark of trees provides support, protection from the elements and nutrients from rainwater. Therefore, good materials for orchid planters include plastic, porous terracotta pots, ceramic and woven plastic mesh pots.
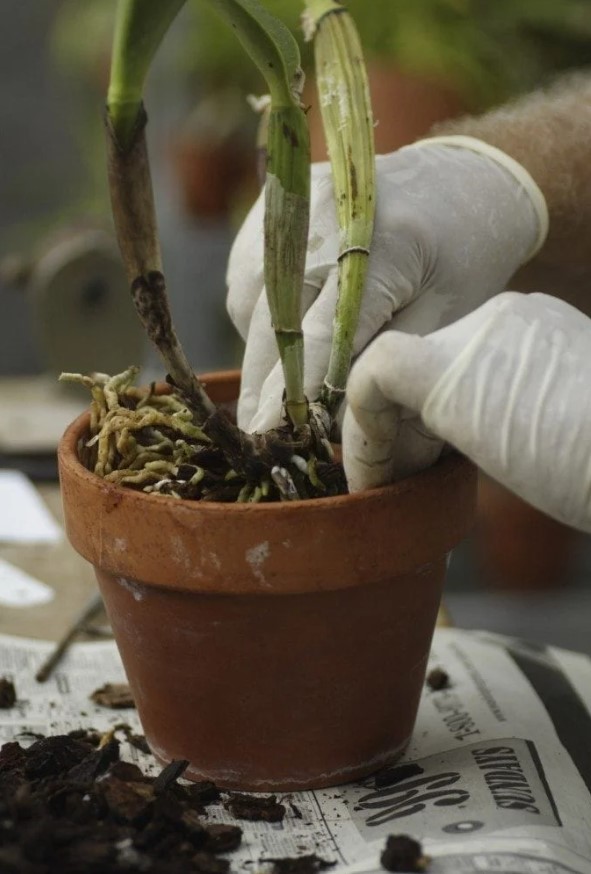
When selecting a potting mix, choose one designed specifically for orchids. Repotting should be done at least every 1-2 years to ensure the plants are getting the nutrients they need.
Here’s What Under-Watered Orchid Roots Look Like
Healthy orchid roots can vary in color depending on the variety of orchid. Phalaenopsis, also known as moth orchids, have plump and silvery green roots that are typically found buried under a layer of potting mix in the pot. The roots of many other types of orchids may be white, but should not be brittle or shriveled. Here’s what under-watered orchid roots look like: they become dry and almost appear to have a rust color on the surface.
If your orchid’s deeper roots are dried out, the plant is likely thirsty. To help keep your orchid healthy, give it a good soaking.
Another Secret to Stiff, Upright Orchid Leaves: Replace the Potting Media
An easy way to help ensure your orchid remains healthy and grows well is to replace the potting media every couple of years. Over time, the potting media will break down and become compacted and more absorbent, which can cause problems for your orchid. When re-potting, you want to make sure that you use a loose, free-draining mix. Another secret to keeping your orchid’s leaves upright is to make sure the potting media has plenty of drainage material, such as bark chips, charcoal and perlite.
When re-potting your orchid, you want to be very gentle with it – use either a plastic pot or a clay pot, depending on the size of your orchid. Make sure the new pot has drainage holes in it, and don’t forget to lay some gravel at the bottom of the pot before adding your mix. When you are done, make sure to water your orchid thoroughly – this will help settle the soil and keep air.
How Orchids are Watered in the Wild
Orchids, native to tropical and semi-tropical climates, prefer a specific type of water cycle compared to other houseplants. In the wild, these plants absorb large quantities of water during heavy rainfalls followed by extended periods of dryness.
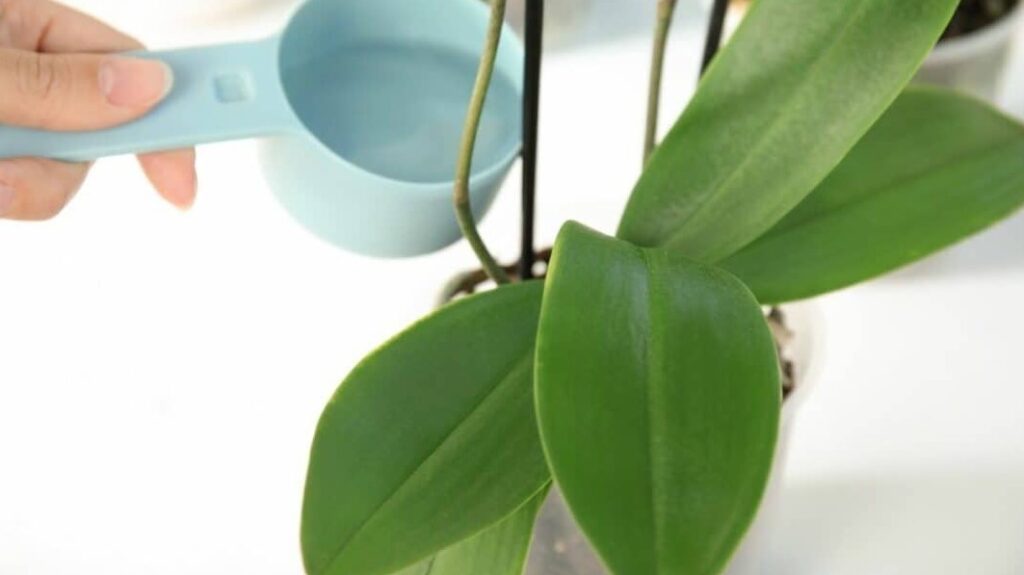
To provide your orchid with the same growing conditions, opt for a free-draining potting mix with quality, organic ingredients. When it’s time to water your orchid, apply copious amounts of water and allow the soil to almost dry out between watering cycles. This simulated rain cycle will encourage the orchid’s roots to absorb moisture in order to survive, resulting in a lush, healthy plant.
Frequently Asked Questions:
How do you revive limp orchid leaves?
Reviving limp orchid leaves is no easy feat, as it requires careful observation and consideration in order to get the job done. The first step is to examine the roots of your orchid. If they appear dry, brown, or wilted, then this points towards a possible over-watering issue.
To remedy this, you should allow the soil to dry out for a few days before resuming regular watering. If the roots are still healthy and green, then this points towards an issue of under-watering. In this case, you should ensure that the orchid is receiving enough water in order to reach its hydration needs.
Will wilted orchid leaves recover?
Wrinkled orchid leaves can be an alarming sight for a gardener, as it often indicates that the orchid is not receiving enough water. Thankfully, if caught in time, the wrinkled leaves may be able to recover and regain their healthy appearance. It’s important to act quickly when you notice wilting leaves on your orchid, as the longer it goes without proper care, the more damage can be done and the lower the chances of recovery.
Should I cut off limp orchid leaves?
Orchid leaves should generally not be cut or trimmed unless they have been affected by a fungal or bacterial disease. Trimming of leaves can create an open wound in the plant, leaving it vulnerable to infection and further damage. However, if an orchid has already become infected, cutting off the affected leaves may help to save the rest of the plant.
To determine if leaves should be trimmed, it is important to inspect the orchid for signs of infection such as yellowing, spotting, and discoloration. If any of these symptoms are present on the leaves, trimming them may be an effective way to help protect the health of your orchid. In this case, use clean.
What do overwatered orchids look like?
Overwatered orchids will have telltale signs that help in identifying the problem. The leaves of the orchid are usually the first place where signs of overwatering start to appear, as they can become limp, pleated, and sometimes even leathery depending on the species.
Existing leaves may begin turning yellow, while new leaves may have a crinkled or pleated look to them. Stems can also become soft and mushy, and in severe cases, the leaves will drop off completely. Additionally, if the potting medium is waterlogged for too long, it can lead to root rot which causes the leaves of the orchid to turn yellow, brown.
How do you revive wilted orchid leaves?
Wilting orchid leaves are a common problem for orchid growers, and one of the most important steps in keeping them healthy is understanding how to revive wilted leaves. Wilting occurs when the orchid does not receive enough water, and it can be difficult to determine the exact cause of wilting and how to address it.
Should I cut off droopy orchid leaves?
Cutting off droopy orchid leaves is a decision that should not be taken lightly, as it requires careful consideration of the possible consequences. If a droopy orchid leaf is cut off, it can be detrimental to the plant’s health, as it will no longer receive any nutrients from the leaf and may even lose water faster.
Why are my orchid leaves limp and wrinkled?
Limp and wrinkled orchid leaves are usually a sign of a health issue. The most common causes for this condition include overwatering, insufficient light, improper temperature, and lack of essential nutrients in the soil.
Overwatering is one of the more common reasons for limp and wrinkled orchid leaves.
What does a dehydrated orchid look like?
When a orchid is dehydrated, the signs can be quite noticeable. The leaves of the plant will look wrinkled and grayish in color. The flower buds may also wither and drop off, leaving sparse or no blooms on the plant. In addition, the stem will feel limp or droop when touched. Read also…
Will wilted orchid leaves recover?
Wilted orchid leaves may recover if the underlying cause of the wilting is addressed promptly. However, if the leaves are severely damaged or the cause of the wilting is not addressed, the leaves may not recover and may eventually die.
Why are my orchids leaves wilting?
There could be several reasons why orchid leaves are wilting, including underwatering, overwatering, excessive heat, low humidity, pests or diseases, or root problems. It’s important to identify and address the underlying cause of the wilting to prevent further damage to the plant.
What do overwatered orchids look like?
Overwatered orchids may have yellow or brown leaves that are mushy to the touch, as well as soft, brown, or black roots. The soil may also have a sour or musty smell.