
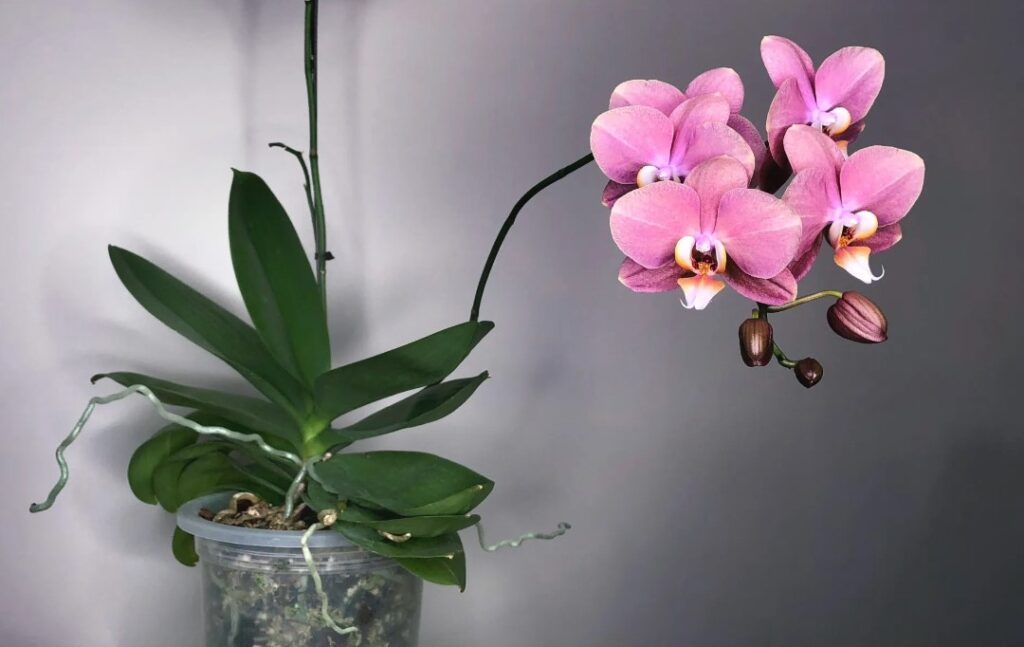
Phalaenopsis orchids (also known as moth orchids) are among the most popular orchids kept as houseplants. They are readily available in many stores that carry plants and commonly given as gifts.
Repotting an orchid can seem daunting at first, but it is actually quite simple if done correctly. The best time to repot your phalaenopsis orchid is when its roots are actively growing and the plant needs more room in its current pot. So, how do you transplant an orchid?
When To Repot Orchids
Repotting an orchid is a crucial part of its care, and it’s important to do it at the right time and in the right way. When repotting an orchid, there are a few key signs that indicate it is indeed time to repot.
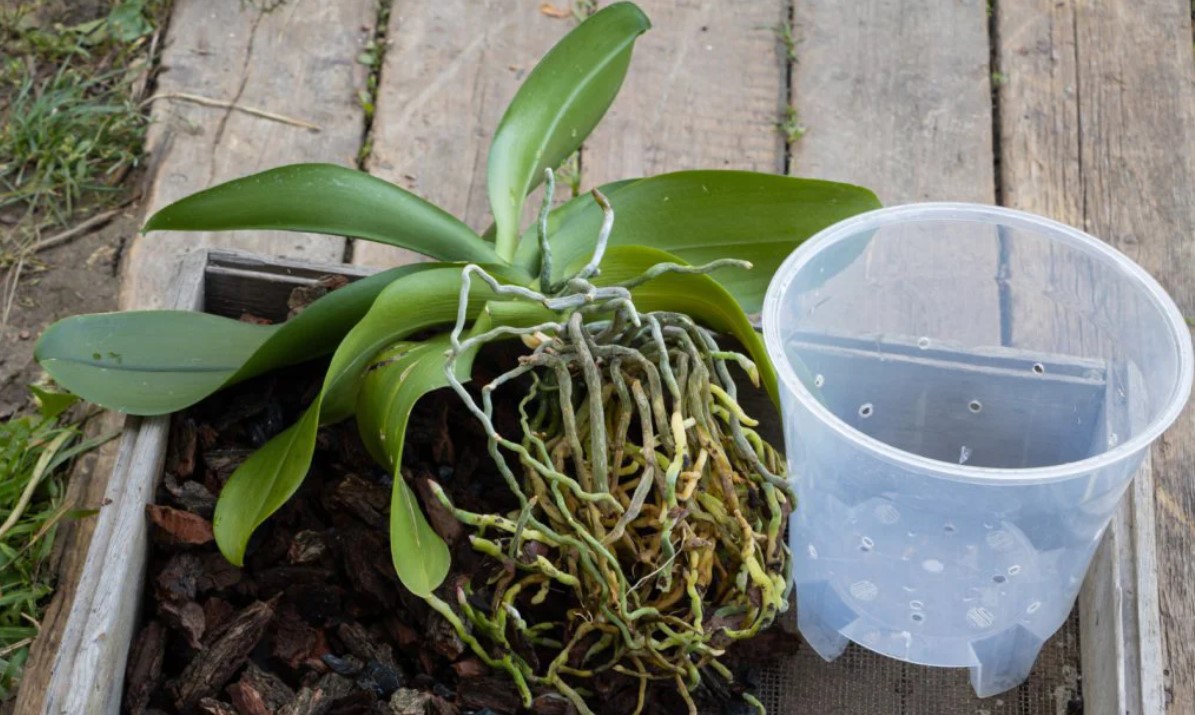
When roots have grown tightly around the edge of the pot, that is a sure sign that the plant needs to be repotted. When you observe or feel roots growing up and out of the drainage holes, this is also an indication that it’s time to repot.
Additionally, if your orchid has been in the same pot for more than three years, it’s probably time to move into a larger.
How To Repot Orchids:
Choose A New Pot
When choosing a new pot for your orchid, it’s important to select a pot that provides plenty of airflow and drainage for healthy roots. Specialized orchid pots typically have holes along the side of the pot as well as on the bottom, which helps deliver more oxygen around the plant.
Basic potting method works for most orchids, some require special care, such as dividing or mounting.
However, other well-draining pots such as terracotta or plastic pots that draw moisture away from the roots are also suitable. To ensure your orchid is not overwatered, it’s best to select a pot with drainage holes on the bottom.
When selecting a larger pot for a repotting project, it’s important to choose a new one or two sizes up at most. A pot that is too large will hold on to too much water and could lead to root rot or other issues.
Choose a pot with plenty of space for the roots to spread, but make sure it’s not too deep so the orchid can still receive adequate sunlight.
The other reason for orchid repotting is when the potting medium begins to break down.
When repotting orchids, it’s vital to use specialized orchid potting mix and not regular potting soil.
Sterilize Your Tools
Start by adding more detail to explain the importance of sterilizing tools.
When it comes to caring for orchids, one of the most important steps you can take is to Sterilize Your Tools. Sterilizing your tools before each use helps protect your plants from bacteria, germs, and other unseen nuisances that could be present on them.
If you don’t Sterilize Your Tools before use, the bacteria and other germs can infect your orchids and cause serious health problems. Not only can these infections lead to root rot, but they can also cause unsightly discoloration of leaves and flowers that could ultimately lead to death.
Water The Plant
When repotting houseplants, it’s usually best not to water the plant for several days to allow the soil to dry out. Watering the plants can make them heavy and difficult to handle, making it challenging to take them out of their pot and transfer them into a new one. However, this is not the case with orchids.

Because their roots can remain dry for long periods of time, they become brittle and difficult to maneuver. It is best to soak the roots in water for around 10 minutes before attempting to repot them. This will ensure that the roots are hydrated and more pliable, making it easier to fit into a new pot.
Cut Off The Flower Spikes
Removing the flower spike of an orchid is an optional yet helpful step to consider when repotting. It can be quite difficult to keep the delicate flowers intact during the process, so those that do remain are likely to fall off anyway due to the shock and changes of transplanting.
But there is a more important reason to cut off the flower spikes: to preserve energy. When an orchid flowers, it uses all its energy for keeping those flowers alive and healthy.
This leaves little for root growth, so cutting off the flower spikes helps direct that energy instead towards roots. This allows the orchid to focus on becoming established in its new pot and growing strong.
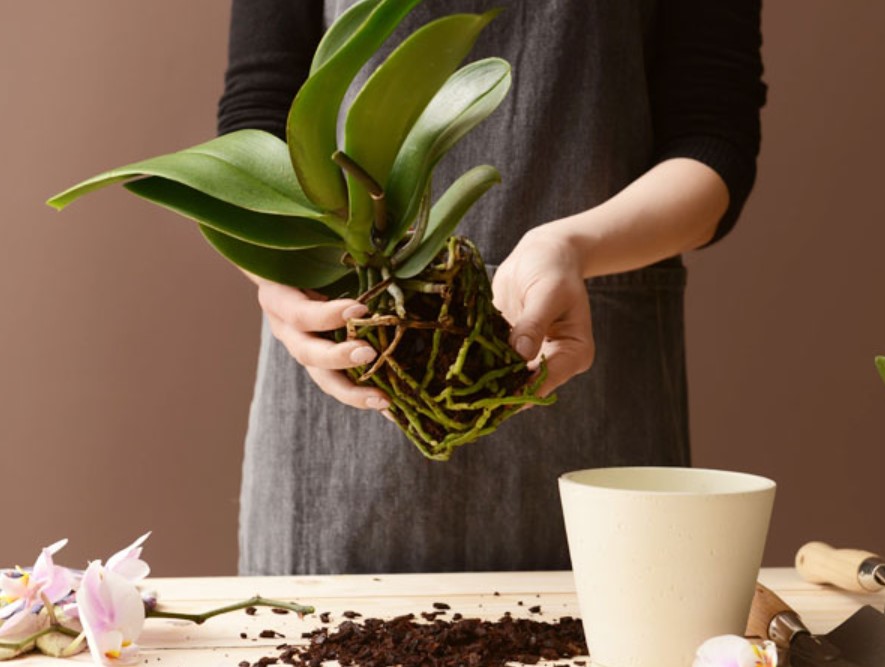
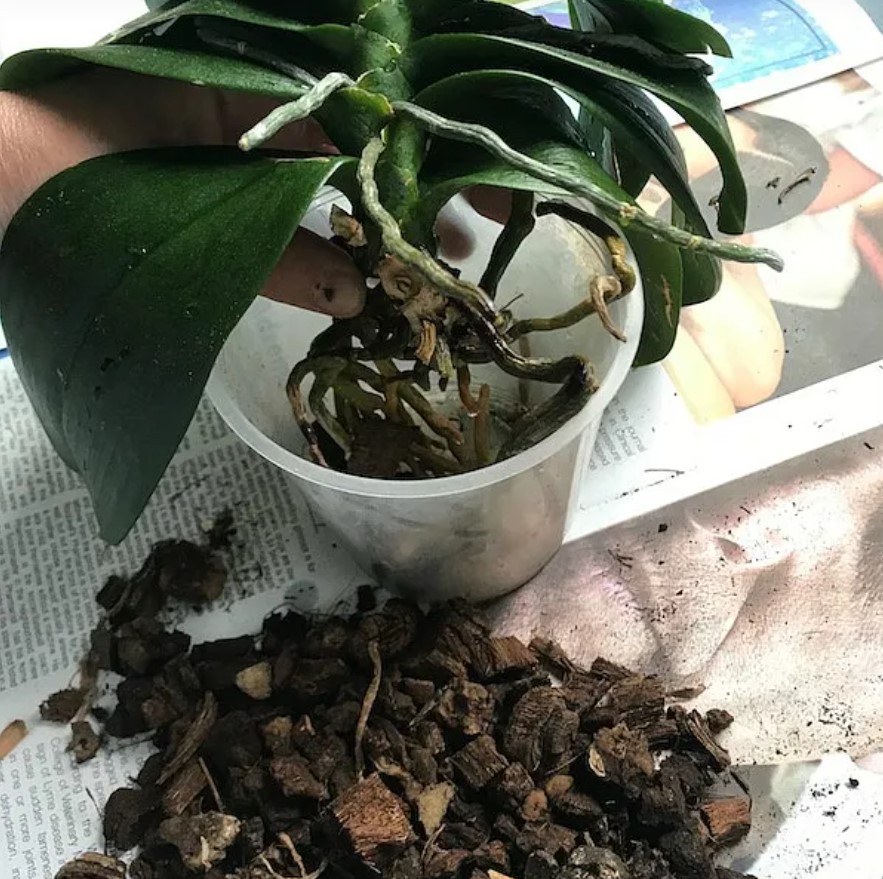
Remove The Plant
Once you have removed the plant from its existing pot, carefully inspect the root system and check for any signs of disease or damage. Remove any dead or damaged roots to promote healthy growth in the new pot. If needed, trim away any large clumps of roots that are tangled together.

This will help ensure that all of the roots are evenly distributed in the new pot. If planting in a new type of container, such as a hanging basket or fabric pot, you may need to prune away some of the root system so that it fits properly.
Be sure to keep any healthy roots intact, and take care not to damage any fragile roots. Once the plant is prepped and ready.
Trim The Roots
With the roots clearly visible from all sides, this is the prime opportunity to check your orchid’s root health. Due to improper care or age, some roots become damaged or die off. It’s vital to remove these to give the plant the best chance of survival and growth in the new pot.
With your disinfected shears or scissors, trim any dead, damaged, or mushy roots up to the healthy growth. Trimming the roots will help ensure that your orchid is in its best condition for growing and thriving.
Healthy roots will be thick and white or green while dead roots will be thin and brown or yellow.
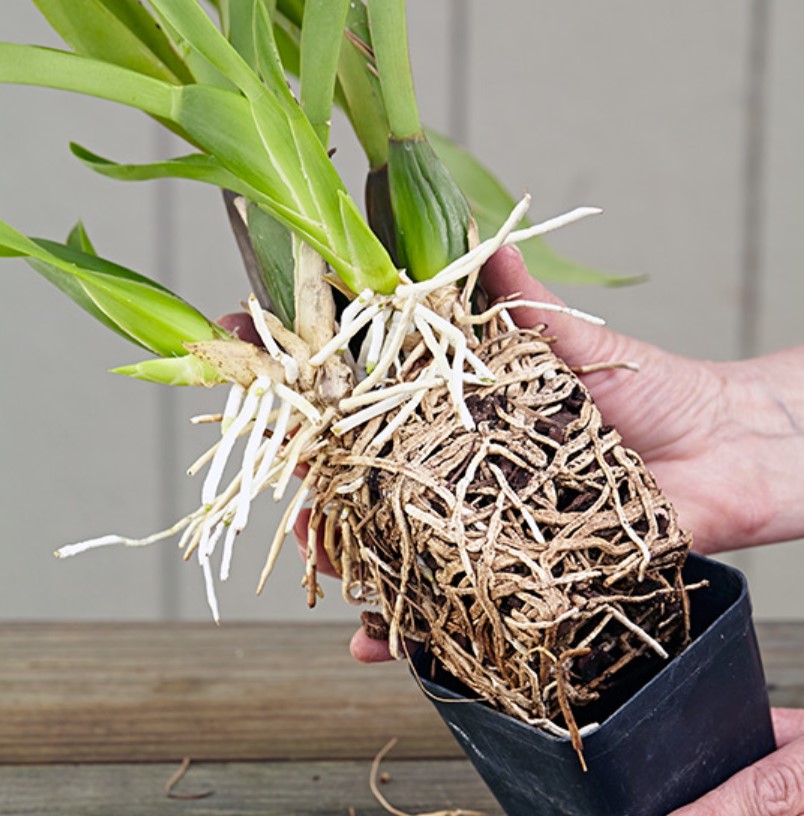
Repot The Plant
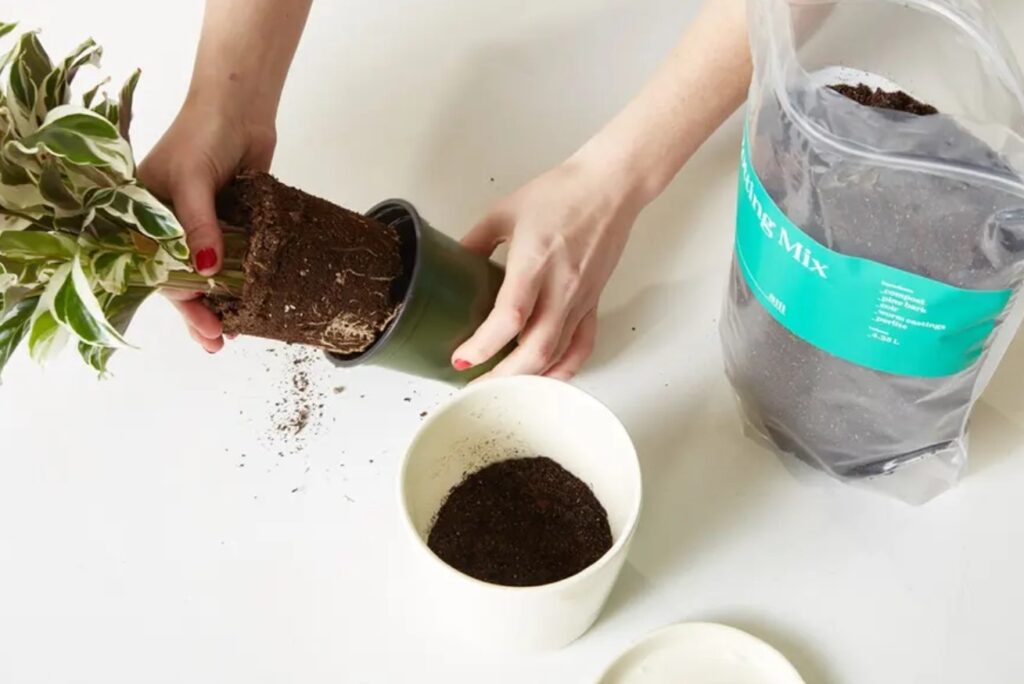
Repotting your plant can be a simple yet rewarding process. Before beginning, it is important to have the right pot and soil for your plant.
Start by gathering the plant and pot you are using for repotting as well as the appropriate soil. To determine how much soil is needed for the bottom of the pot, place the plant inside the pot just below the rim and measure the space between the roots and the bottom of the pot.
Then, layer a thickness of soil in accordance with that measurement. Collect the roots together and place them on top of this soil layer. Depending on the size of your plant, you may need to hold it in place while filling.
What Is a Monopodial Orchid?
Monopodial orchids are some of the most popular types of orchids among growers due to their stunning flowers, ease of care, and ability to be easily repotted.
Phalaenopsis is a popular genus of monopodial orchid, which means that it has one single stem with one root system from which it produces its leaves and blooms. What is a monopodial orchid, and why is it so easy to repot?
A monopodial orchid is an orchid that has only one stem with one root system, as opposed to sympodial orchids which have multiple stems with multiple root systems.
Repotting Phalaenopsis Orchids
Repotting your phalaenopsis orchid is an important part of keeping it healthy and happy. Repotting helps to ensure that the roots have access to adequate oxygen, fertilizer, and water, as well as keeps the soil from becoming too compact.
Repotting should be done every year or two depending on the age of your.
When to Repot a Phalaenopsis Orchid
Repotting your Phalaenopsis orchid is essential to keeping it healthy and happy. When the time comes to repot, it’s important to be aware of both the timing and the method you use.
The general rule is that a phalaenopsis orchid should be repotted once every two years. However, there may be times when you need to repot sooner than that. Here are some signs to look out for that indicate it’s time to repot your orchid:
– When the bark in the growing medium has started to break down due to age or overuse of fertilizer.
– When the roots have filled the pot and are starting to wind around each other.
– When there’s visible rot or fungal growth on the roots or in the potting soil.
– When your orchid isn’t blooming as much as it once did.
Time of Year to Repot an Orchid
Repotting an orchid is a task that should be done carefully in order to ensure the health, beauty, and longevity of the plant. Although it is best to repot an orchid during spring, it can also be done during fall as long as there are at least a couple of weeks before it begins blooming again.
Repotting during the summer is possible but should be done with caution.
If you need to repot during the summer, make sure to give your orchid a few weeks of rest before repotting. Following these suggestions will help you keep your orchid in top condition and ensure that it remains healthy and blooms beautifully for years to come.
How to create your own potting mix
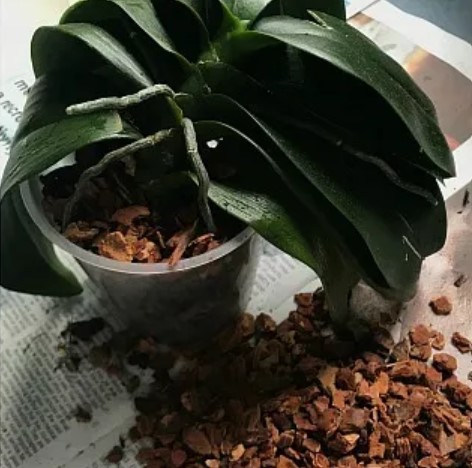
Creating your own potting mix is a great way to ensure your orchids are getting the perfect blend of air, water, and nutrients. A good mix for growing orchids should contain three parts fir bark, one part perlite, and one part sphagnum moss. Fir bark helps to aerate the soil while also providing a good structure for the plant to grow.
It is important to use a coarse bark such as fir, because it provides plenty of room for air circulation. Perlite is then added to absorb water and improve drainage, while sphagnum moss helps the mix hold onto moisture. Since phalaenopsis orchids do not have much water.
FAQ:
Do phalaenopsis orchids like to be root-bound?
Yes, phalaenopsis orchids do like to be root-bound. This means that their roots are allowed to get somewhat close together, rather than spread out and apart as one might expect. In this way, the plant is able to absorb more nutrients and water from its growing medium more easily.
What do you soak orchid roots in before repotting?
The best way to soak orchid roots before repotting is in lukewarm water. This helps the roots to become more pliable and less likely to be damaged by the repotting process. Additionally, the warm water helps to encourage the roots to grow outwards, making them less likely to get stuck in any of the new.
Can I repot an orchid in regular potting soil?
No, you cannot repot an orchid in regular potting soil. As epiphytic plants, orchids require a bark-based mixture that is more airy and less dense than traditional soil.
Potting soil is too dense for an orchid’s roots to take hold and grow, as it lacks the aeration needed to keep them healthy. If you are repotting an orchid, look for an orchid-specific potting mix that contains ingredients such as fir bark, charcoal, sphagnum moss, and perlite to ensure your plant is able to get the air it needs. Read also…

How do you replant an orchid without killing it?
To replant an orchid without killing it, choose an appropriate pot and potting mix, carefully remove the orchid from its old pot and trim any dead or damaged roots, repot the orchid into the new pot with fresh potting mix, water thoroughly, and provide appropriate care and monitoring during the acclimation period.
How do you repot an orchid for beginners?
To repot an orchid for beginners, soak the orchid, gently remove it from its old pot, trim dead roots, place it into a new pot with fresh potting mix, water it thoroughly, and monitor and care for the orchid during the acclimation period.
Can I repot an orchid in regular potting soil?
It is generally not recommended to use regular potting soil for orchids, as it tends to retain too much moisture and can suffocate the orchid’s roots. Orchids require a well-draining and aerated potting mix that can provide good airflow and prevent water from accumulating around the roots. Specialized orchid potting mixes are available, or you can make your own mix using materials like bark, sphagnum moss, perlite, and charcoal.
Do orchids like to be transplanted?
Orchids don’t necessarily like to be transplanted frequently, but they do benefit from occasional repotting when the potting mix breaks down or becomes too compacted. Repotting can provide fresh nutrients, improve drainage and aeration, and prevent root rot. However, it’s important not to repot too frequently, as orchids prefer to have a stable root environment and can take some time to adjust after being repotted.
Should I water my orchid after transplanting?
Yes, you should water your orchid after transplanting, but wait a day or two to allow the orchid to adjust to its new environment before watering. When you do water, water the orchid thoroughly and allow the excess water to drain out of the bottom of the pot. This will help to settle the potting mix around the roots and provide the orchid with the moisture it needs to recover from the transplant shock.
Can I cut the aerial roots off my orchid?
It’s generally not recommended to cut off healthy aerial roots from your orchid, as they play an important role in the plant’s overall health and well-being. Aerial roots help the orchid to absorb moisture and nutrients from the air, and they can also assist with anchoring the plant to its support structure. If the aerial roots are dead or damaged, you can carefully remove them with sterilized scissors or a sharp knife, but avoid cutting off healthy roots.