

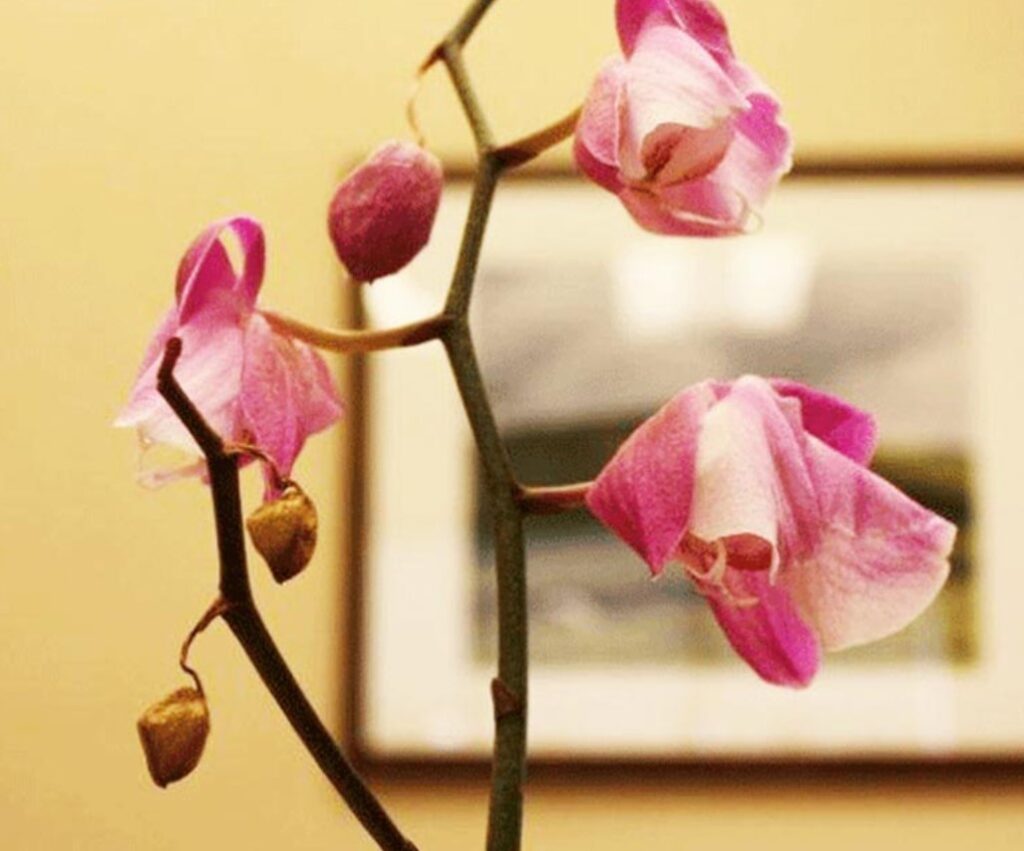
Are you wondering why are my orchids dying? Orchids require a specific set of conditions to thrive, and it can be a challenge for even the most experienced of gardeners to provide them with the necessary environment that they need.
In addition, orchids are also sensitive to a range of environmental factors such as temperature fluctuations, lack of humidity and too much direct sunlight.
With the correct care and attention your orchid can be saved and should soon start to revive.
If your orchid continues to struggle, it may be best to consult with a professional about the best steps for saving your plant. With their help and guidance you can soon have a happy and healthy orchid in your home again!
Orchid Dying due to Overwatering (orchid roots rot/root rot)
Common Reasons for Dying Orchid:
Potting Medium Retains too Much Moisture: When selecting a potting medium for orchids, it is essential to ensure that it is well-aerated and provides good drainage.
Potting soils and moss are often used, however they can retain too much moisture around the roots of the orchid which can lead to root rot.
This can be due to their high water retention capacity and content of organic matter. Instead, pine bark is a better choice as it has excellent aeration and drainage capabilities, allowing oxygen to reach the roots, while also providing necessary nutrients for the orchid.
Pine bark also does not contain large amounts of organic matter that can cause water-logged conditions in pots.
Thus, when growing orchids, it is important to select a potting medium with well-aeration and drainage properties, such as pine bark, to ensure that the roots of the orchid are not exposed to too much moisture.
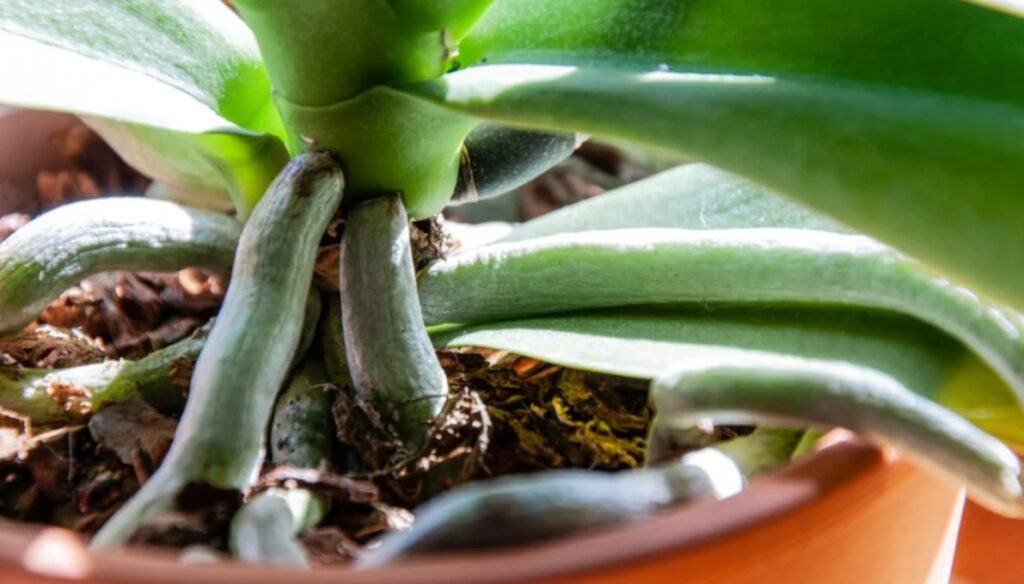
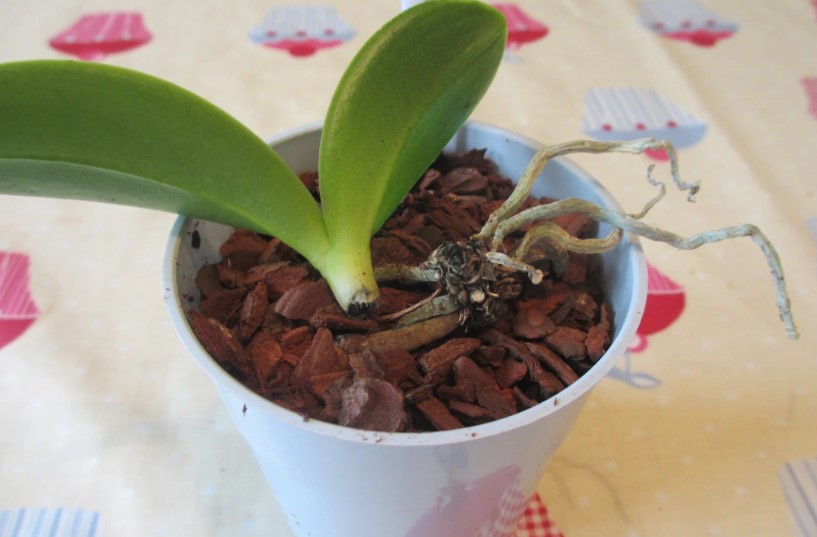
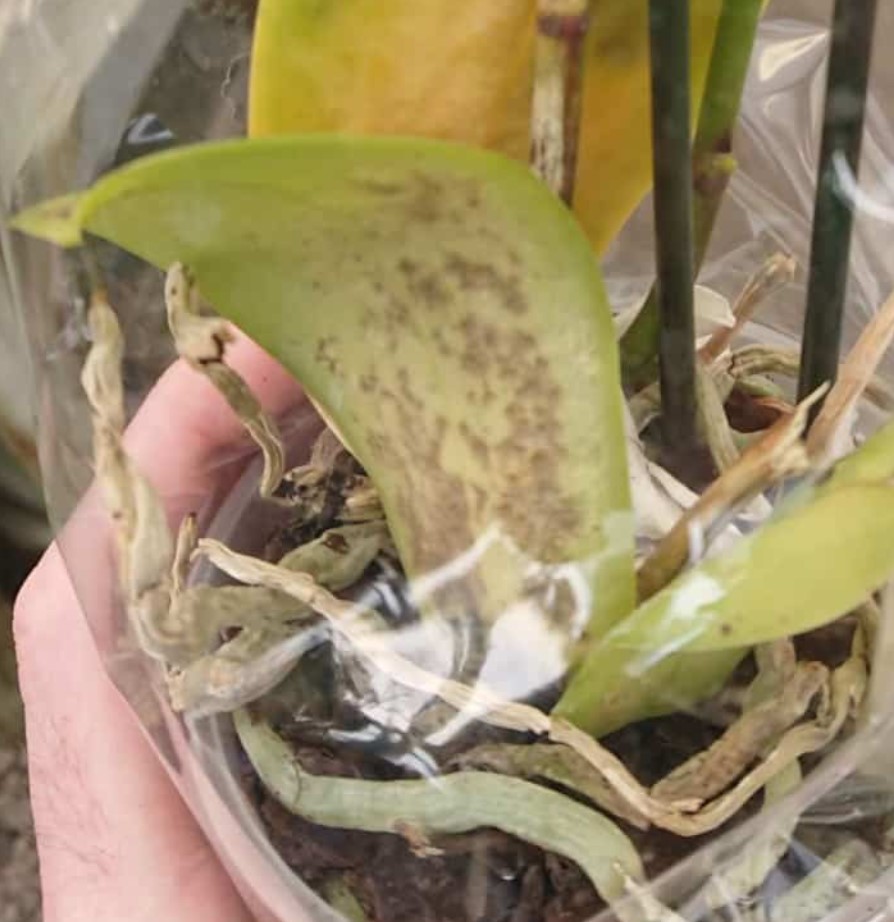
Underwatering: Underwatering is one of the most common causes of orchid root shriveling and wilted yellow leaves turning. If the orchid is not watered correctly, the roots are not able to absorb the necessary moisture and nutrients that they need to survive.
Underwatering can happen when an orchid’s potting media is allowed to dry out completely between waterings. In order to avoid underwatering, it is important to water the orchid thoroughly once every 7 days.
This will ensure that the roots have access to enough moisture and nutrients for healthy growth. It may also be necessary to check the potting media regularly for signs of drying, as this could indicate an issue with the watering frequency.
Additionally, ensuring that the potting media is not allowed to become too saturated with water can also help prevent issues related to underwatering. With proper care and attention, orchids can be kept healthy and vibrant!
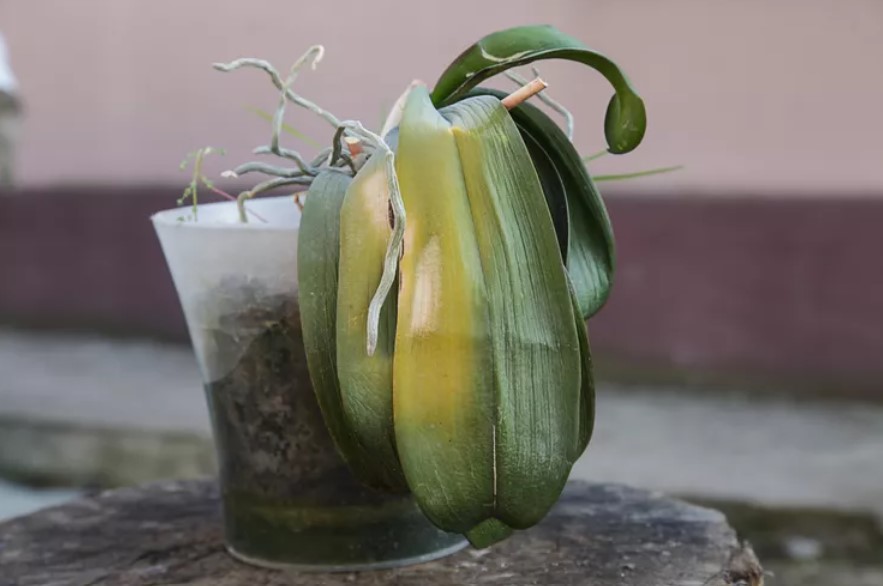
Humidity is too Low: Orchids are beautiful and exotic tropical plants that are often found in humid climates. Although they can withstand some dryness, the ideal humidity for orchids is at least 65%.
If the air around them gets too dry, their leaves and roots will visibly shrivel up, eventually leading to death of the plant if left untreated.
Draughts, Air Currents and Sources of Heat Drying Orchid out: Orchids are a delicate flower, and it is important to ensure that their environment remains stable for them to thrive.
Draughts can be one of the most common causes of orchid flowers dropping and turning yellow due to stress. Draughts occur when there is an increase in air currents due to sudden changes in temperature, or from sources of heat and cold drying the orchid out.
Draughts can be hard to detect, so it is important to ensure that your orchid is in a location where there is minimal air flow and no significant changes in temperature. It is also important to avoid leaving any sources of hot or cold air near your orchid, such as air conditioning vents and windows, as these can cause too much air flow and stress the orchid out. By providing a stable environment for your orchid, you can help ensure it remains healthy and blooms beautifully.
Too Much Sunlight: Orchids have specific light needs, requiring partial sun or filtered light in order to thrive. Too much direct sunlight can be damaging and will result in yellow or brown scorched leaves. Too little sunlight can also stunt an orchid’s growth, making it difficult for the plant to survive.
When caring for an orchid, it is important to take into account the amount of sunlight that it receives. Too much direct sunlight can quickly damage the delicate leaves, but too little sunlight can also lead to stunted growth and eventually death for the plant. Sun exposure should be monitored closely in order to provide an optimal environment for the orchid’s needs.
If providing too much sun exposure, the orchid should be moved to a different location with less direct sunlight. Alternatively, providing more indirect light can help reduce the risk of damage caused by too much sunlight. Proper positioning of the orchid is essential for proper growth and development. If you believe your orchid may be receiving too much sun exposure, it is important to take action quickly in order to prevent further damage. With the right amount of sunlight, your orchid can thrive and bring vibrant beauty to your home.
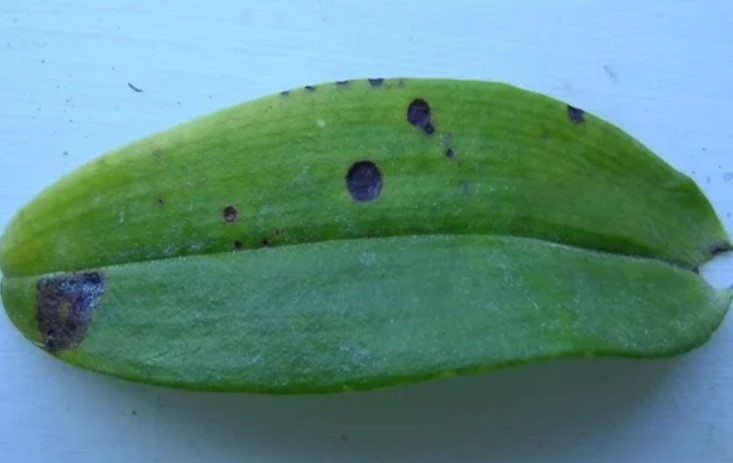
Crown Rot: Crown rot is a fungal disease that affects orchids. It is caused by pathogenic fungi found in stagnant water, which can collect in the crown of the plant due to overhead watering. Crown rot can be identified by yellowing of the leaves and stems and eventually spreading around the orchid, killing the roots. Crown rot poses a serious threat to orchid health, and should be treated quickly in order to prevent further damage.
To prevent crown rot, it is important to ensure that water drains away from the plant Crown, and never allow water to pool and stagnate around the Crown. Additionally, proper ventilation of the growing area can help reduce the risk of fungal infection as well. If Crown rot is diagnosed, it is important to take steps to treat the infection immediately, such as removing affected leaves or stems and treating with fungicides. Taking these measures can help protect your orchid from Crown rot and allow it to thrive.
Orchids are a beautiful and exotic species of flowering plants that can be seen in many households around the world. Orchids require careful upkeep and attention to ensure they stay healthy and happy.
Unfortunately, one of the most common reasons for orchids dying is due to overwatering. When orchid plants receive too much water, their roots become overwatered and begin to rot. Orchid root rot is a serious issue that can lead to yellowing leaves and drooping plants.
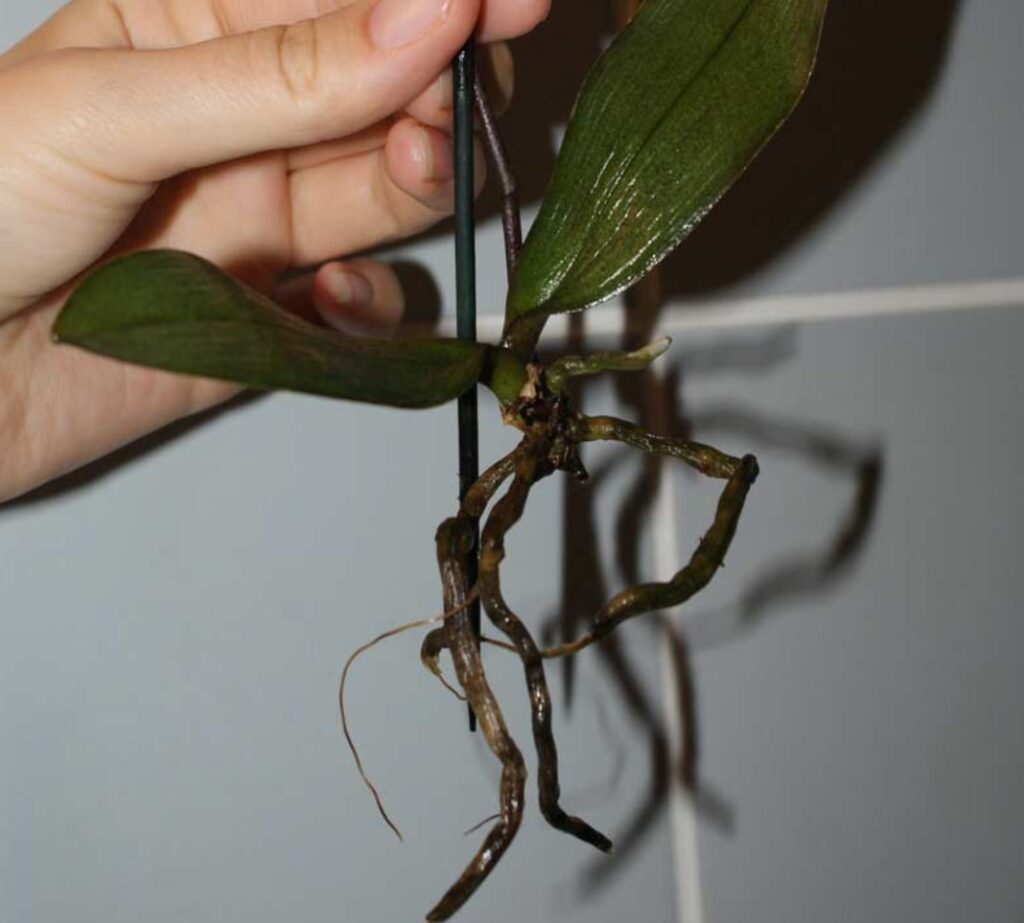
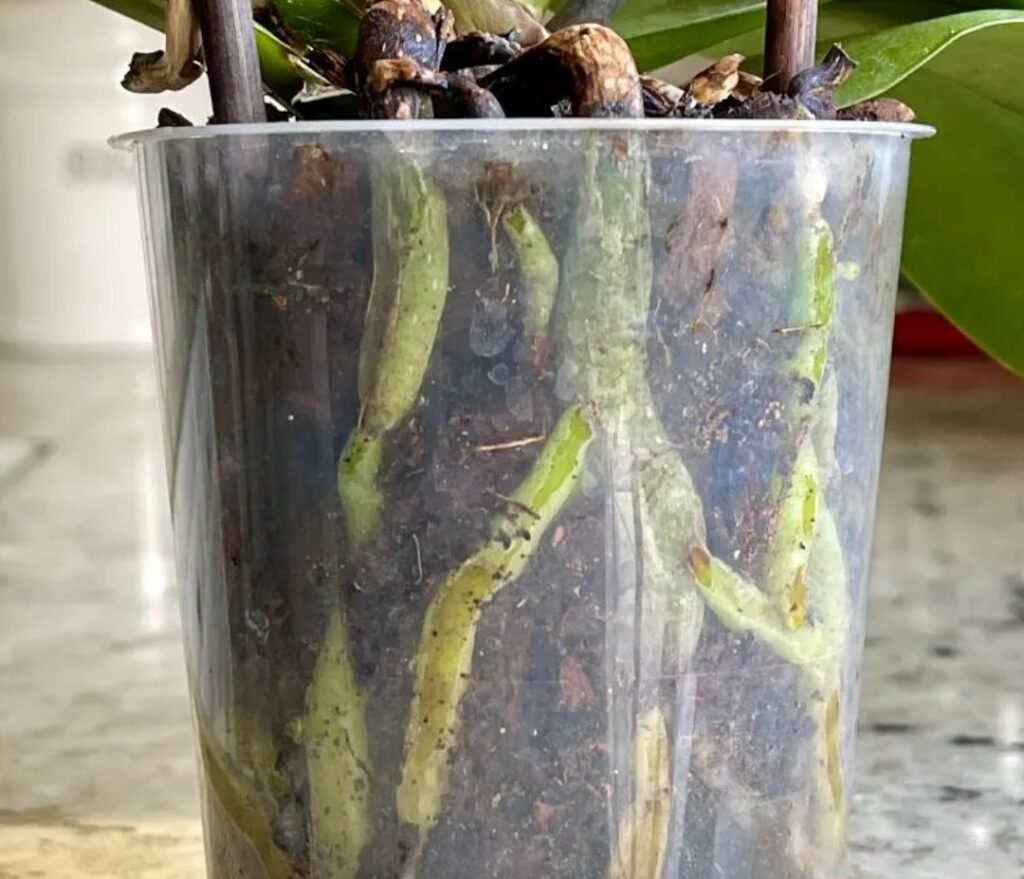
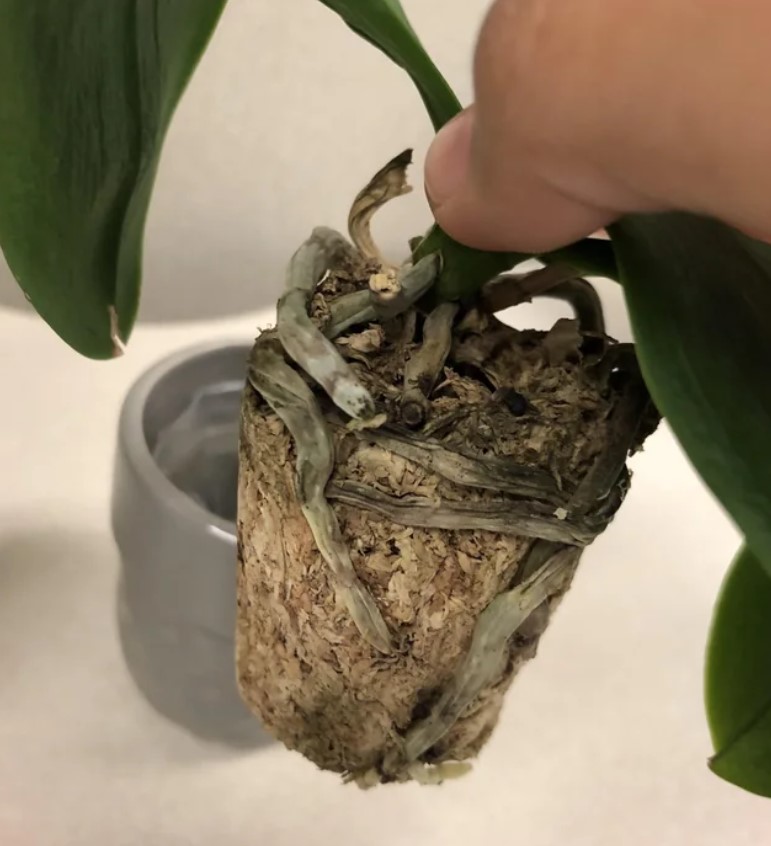
A tell-tale sign of orchid root rot is when the plant’s roots turn rotten with an unpleasant smell and become white in color, eventually dying back to a papery texture.
How to Save Overwatered Orchids with Root Rot…
Saving an overwatered orchid with root rot can be a tricky process. It is important to first understand what caused the root rot in order for it to not happen again.
Common causes of root rot include too frequent watering, using water that is too cold, and using poor quality soil or potting media.
The first step in saving an overwatered orchid with root rot is to drastically reduce the amount of water given to the plant.

Orchids should only be watered once a week in the Spring and Summer and once every 7-10 days in Fall and Winter. Allow the potting medium to dry out completely between watering sessions.
Potting Medium Retains Too Much Moisture Around Orchids Roots
Orchids are a beautiful and delicate specimen, but they require the correct environment and potting medium to thrive. Potting mediums that are soil or moss-based retain too much moisture around the orchid’s roots, preventing adequate air circulation and leading to root rot.
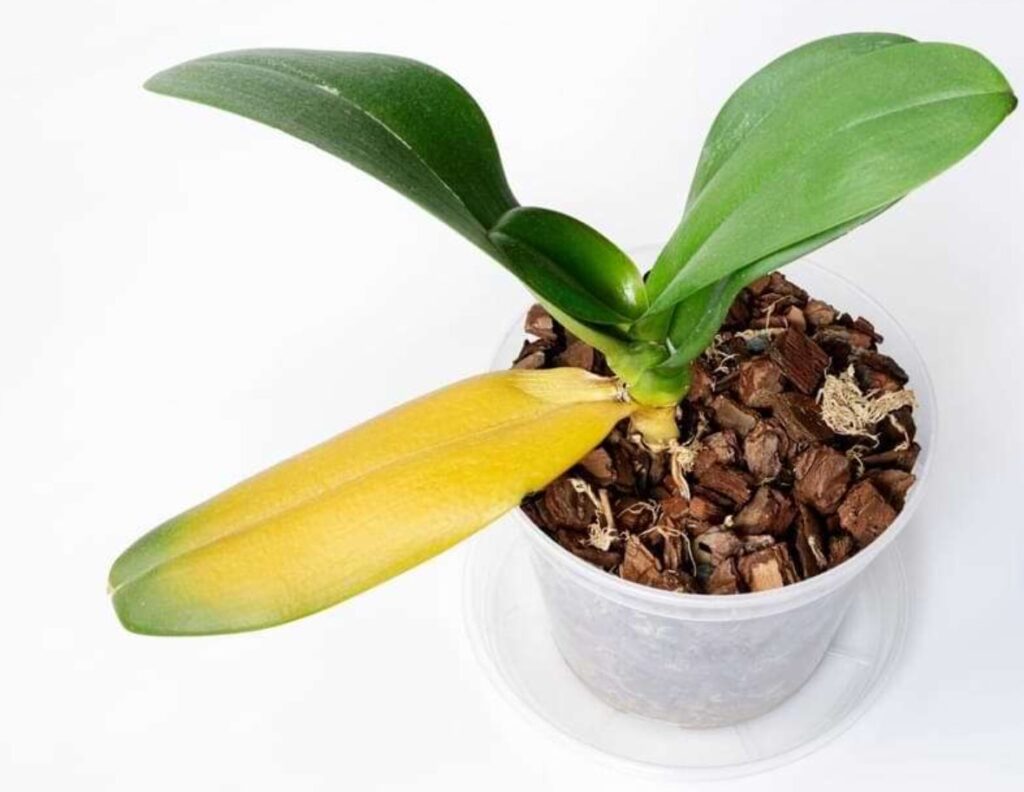
This can cause the orchid’s leaves to turn yellow and wilt if they are planted in these types of mediums.
Tropical orchids, such as the Moth orchid (phalaenopsis), naturally grow on trees in tropical forests and do not have their roots rooted in soil like other plants, so it is important to use a potting medium that allows for airflow and water drainage such as an aerated pine bark.
By using the right potting medium, you can ensure that your orchids will be able to thrive and remain healthy for many years!
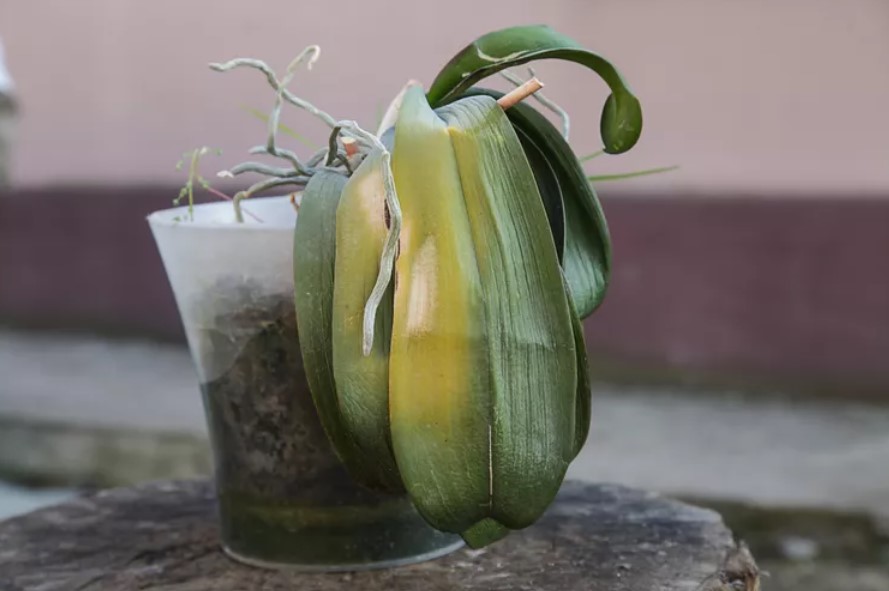
How to Save Orchids Turning Yellow and Wilting
If your orchid is turning yellow and wilting, there are steps you can take to save it. First, remove the orchid carefully from its pot and gently remove the moss or soil from around the roots.
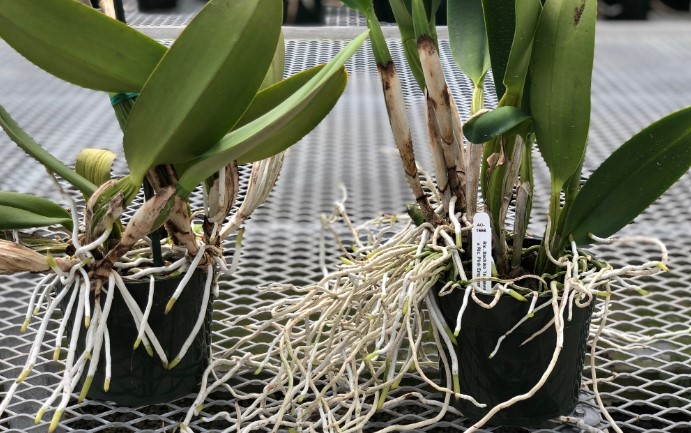
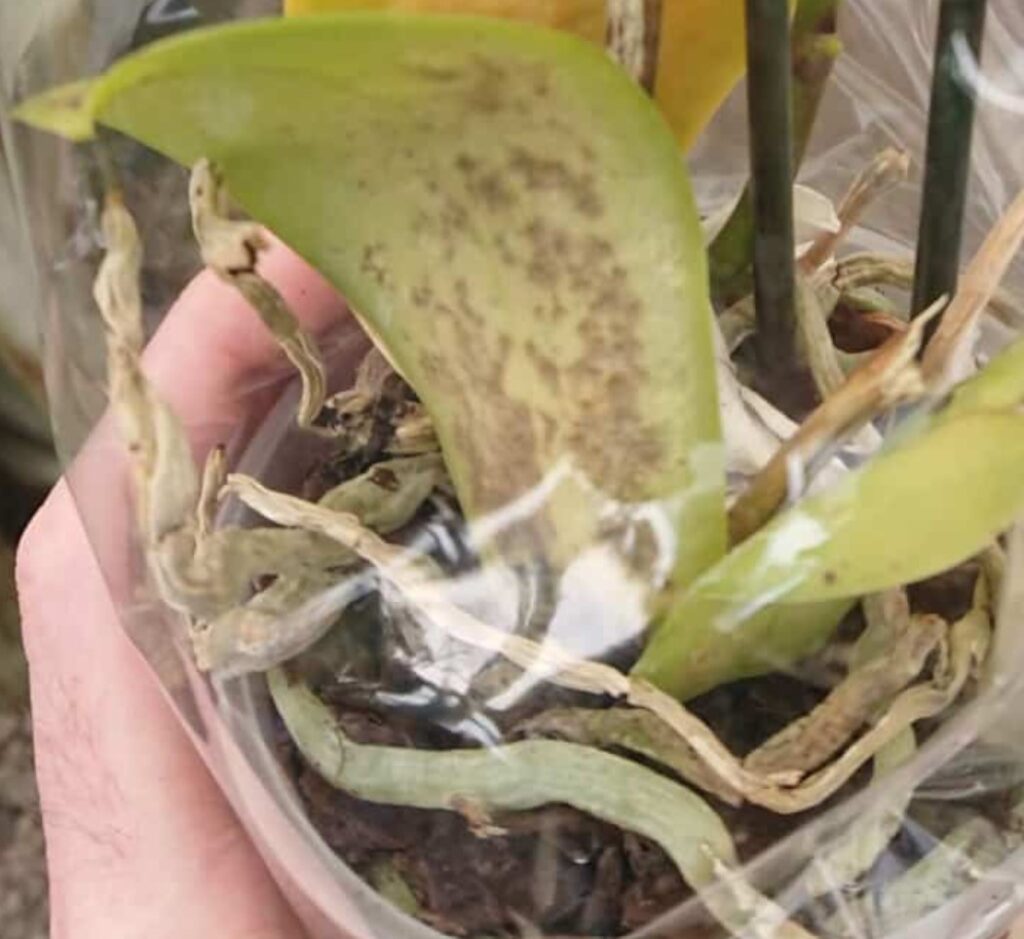
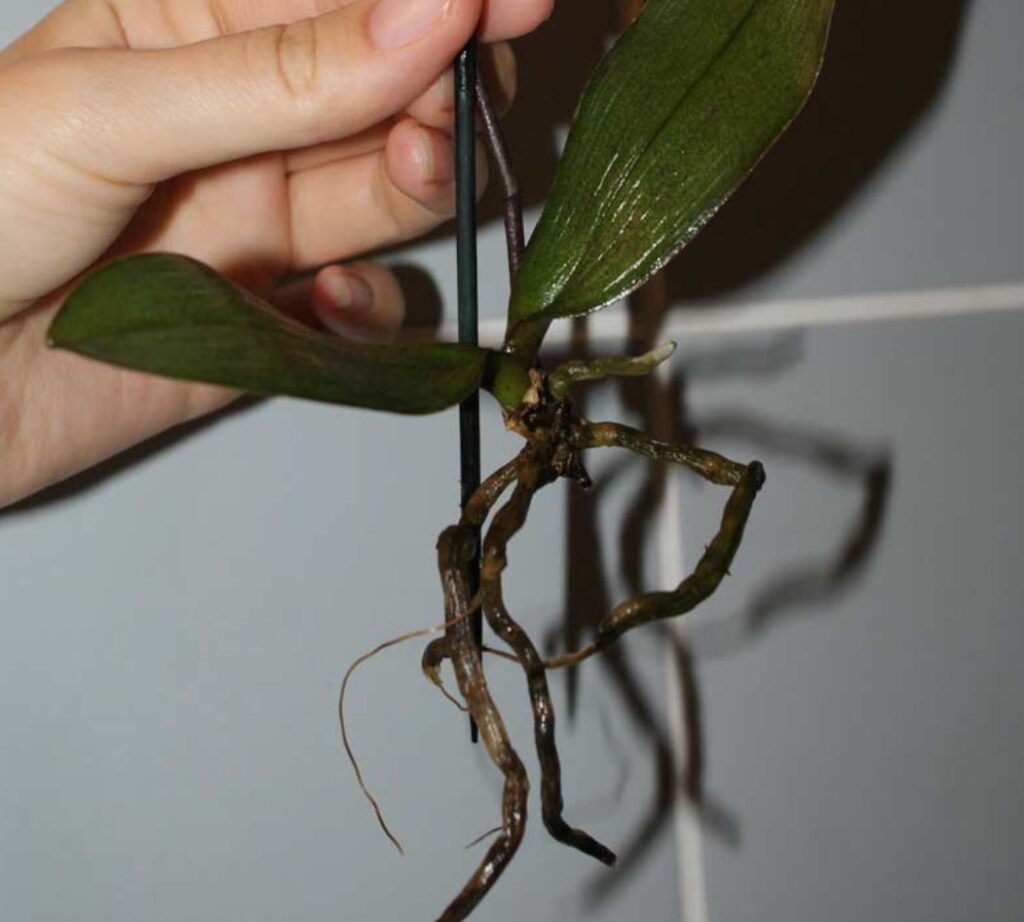
Inspect the roots for any signs of disease or stress – healthy roots appear green or light gray and feel plump, while unhealthy roots are thin, shriveled, and can be yellow, brown or papery gray.
If you find any unhealthy or diseased roots, use a sterile pair of pruners or scissors to cut them back to the base. Wipe the blades with a cloth soaked in disinfectant between cuts to prevent the potential spread of any fungal disease to otherwise healthy growth.
After that, replace the potting soil with a brand new pine bark potting medium specifically formulated for orchids. This new soil should provide better drainage and aeration to help the orchid retain water and nutrients more effectively.

You can also fertilize your orchid using a specialized orchid fertilizer to further encourage healthy growth.
With the right care and attention, you can help your orchid recover from wilting and yellowing. By following these steps, you will be well on your way to saving your orchid and restoring its vibrant colors. Good luck!
Flower Spikes/Orchid Dying Due to Underwatering
Orchids are sensitive plants and require special attention when it comes to watering. Orchids do not need much water but can suffer serious damage if they are underwatered or overwatered.
Underwatering an orchid can cause the roots to die back and for the leaves to droop and turn yellow, which is a sign of drought stress.
Orchids that are underwatered should be watered more frequently with larger quantities of water. It is important to ensure that the entire potting medium becomes moist, as this will allow the roots to access the moisture they need.
Orchids should also be fertilized regularly in order to promote healthy growth and prevent orchid is dying due to underwatering. Following these guidelines will help ensure that your orchid remains healthy and vibrant.
Hot and Cold Temperatures- Dying Orchids
Moth orchids are a delicate and beautiful species of flower, but they require very specific care.
Hot and cold temperatures are not the only things that can damage your orchid; sudden fluctuations in temperature caused by open doors or fans can also cause extreme stress to your flower.
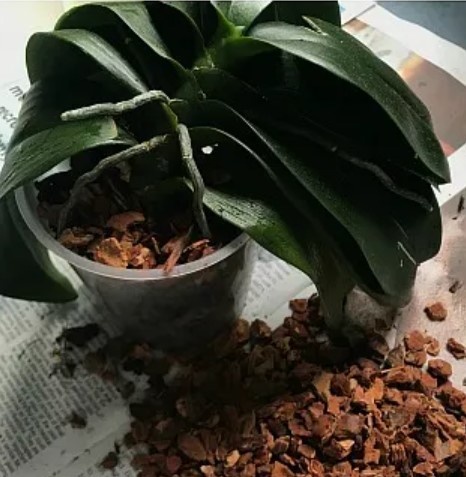
Causes of Dying Orchids- Crown Rot
Crown rot is a common cause of dying orchids, and is typically caused by pools of stagnant water that accumulate around the plant’s crown. This can be a result of the shape and arrangement of the orchid’s leaves, which often form a funnel-like shape and collect water.
If this water is not drained away, it can lead to crown rot, which is identified by the orchid’s leaves and stems turning yellow and wilting.
In order to prevent this from happening, growers should aim to provide their orchids with an environment that mimics their natural habitat as closely as possible.
This means placing them at a 45° angle, similar to how they would typically grow on trees. This will allow any water that collects around the orchid’s crown to safely drain away and avoid causing crown rot.
Additionally, growers should ensure that their orchids are planted in well-draining soil and watered regularly so as not to cause an accumulation of stagnant water around the crown.
Following these steps can significantly reduce the chances of an orchid experiencing crown rot and dying.
Ultimately, crown rot is a common cause of dying orchids and can be easily avoided with proper care and attention to their environment. With good maintenance practices, you’ll have beautiful, healthy orchids in no time!
Too Much or Not Enough Fertilizer- Dying Orchids
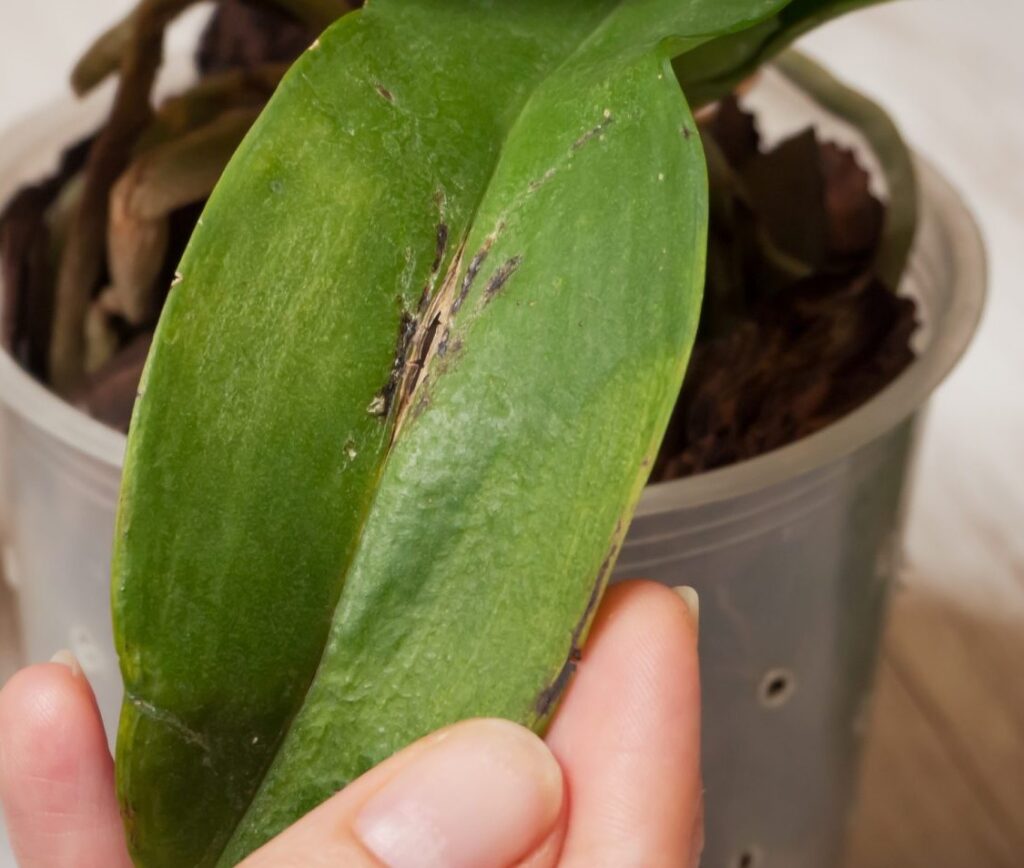
Orchids require very specific care and attention, and the most important aspect is the correct frequency and amount of fertilizer. Too much or not enough fertilizer can be detrimental to the health of your orchid, resulting in root burn.
Too little fertilizer can lead to poor blooming and growth while too much fertilizer will cause the orchid’s roots to turn dark brown or black. This damage is known as root burn and can be difficult to undo.
To prevent root burn, always use a specifically formulated orchid fertilizer that has the right balance of nutrients at the correct concentration.
If there is only mild damage to the roots, then it may be possible to reduce further root burn by decreasing the frequency of fertilizer application and using less fertilizer.
Too much root burn, however, can cause the orchid to die. Taking proper care of your orchid by using the right amount and type of fertilizer is essential for its health and longevity.
How to Save a Dying Orchid in 5 Steps
Reviving a dying orchid can be a challenge, but with the right steps and patience, it is possible. The Phalaenopsis orchid is the most commonly sold in North America and has relatively low maintenance compared to other varieties.

If you have an unhealthy or dying orchid, here are 5 steps that can help you bring it back to life.
Observe the Orchid and Diagnose the Problem
Observing the orchid is an important step when diagnosing a problem. To properly diagnose your orchid, look for any discoloration, wilting leaves, or signs of fungus.
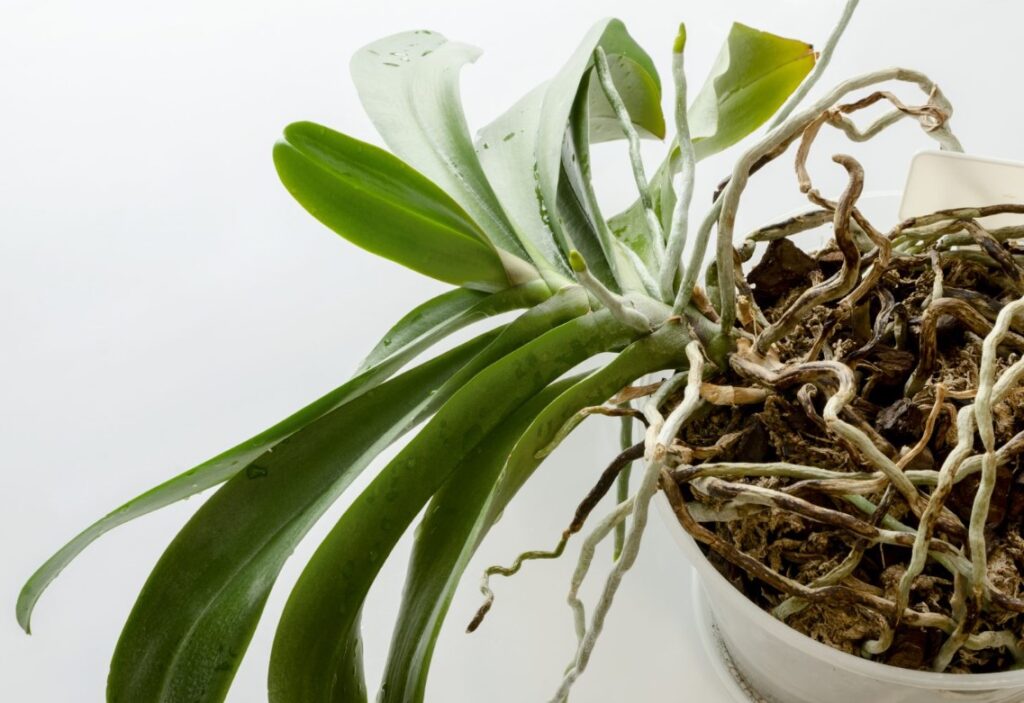
Observe the root system as well – healthy roots should be firm and white while unhealthy ones are soft and brownish. Examine the color of the leaves – healthy leaves are usually deep green, while unhealthy ones may be yellowing or wilting.

If your orchid has not bloomed for a few months, it could be in its dormant stage. In that case, make sure you don’t overwater the plant and let it rest until new growth appears.
Orchids prefer not to be misted as it can lead to crown rot.
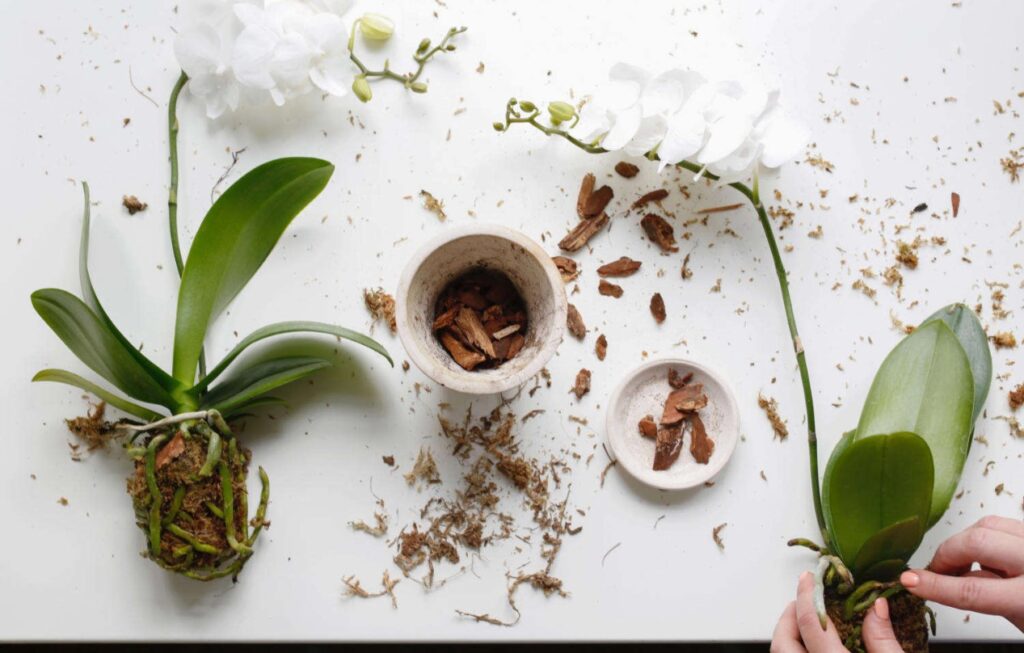
Remove the Orchid and Discard Old Media
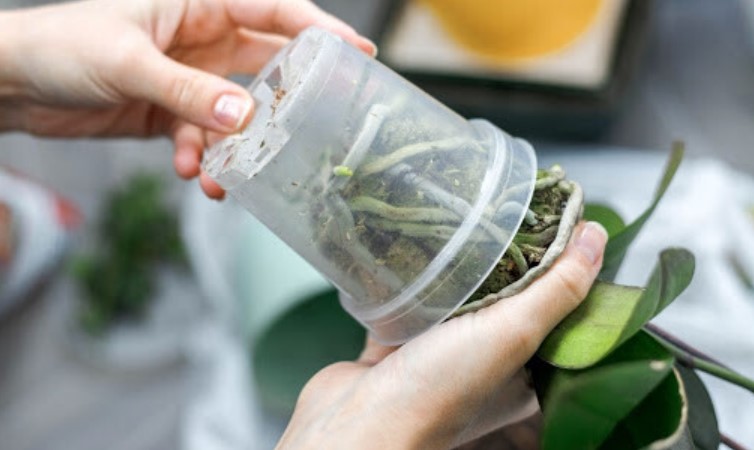
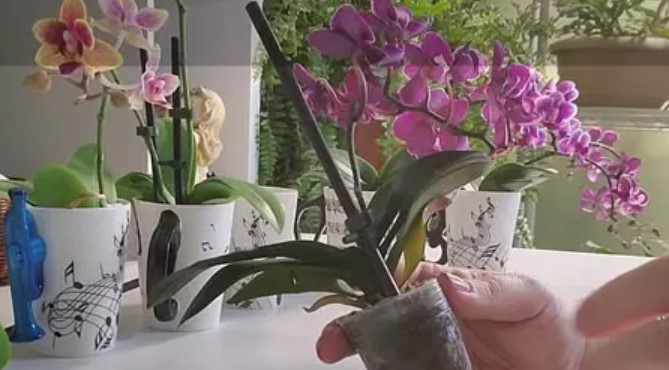
To remove an orchid from its pot, start by squeezing the bottom of the plastic pot to loosen it, then gently pull the orchid out.
Remove all of the existing potting media, such as bark chips, moss, mulch, and bits of soil. Be careful during this process as the roots tend to be intertwined with the media mix.
After the orchid is out of the pot, lightly rinse off the roots with water to clean them up from debris. This will make it easier to identify any excess or damaged roots that need trimming.
When you’ve finished removing the orchid and discarding its old potting media, your plant is ready for repotting.

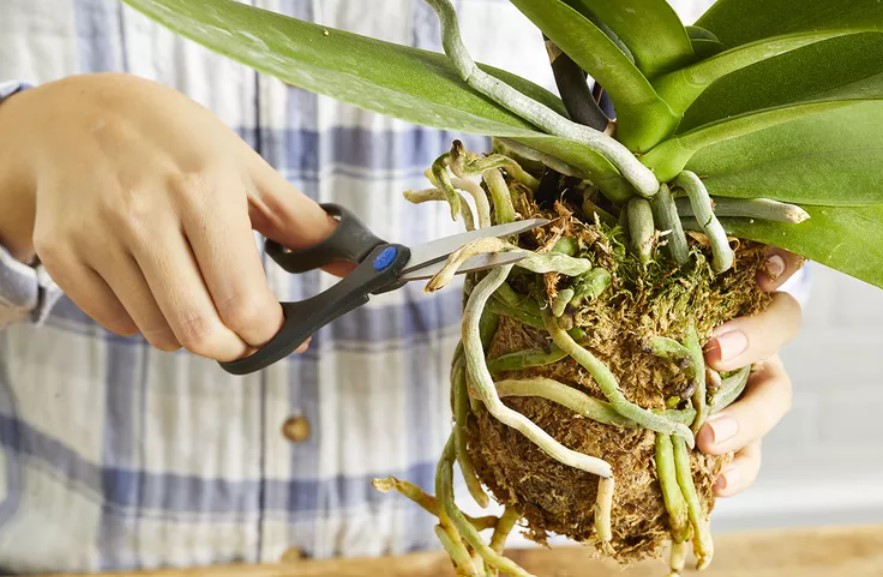
Cut off the Dead Roots
When trimming off the dead roots from an orchid, it is important to have a sharp pair of shears or a razor blade. Before beginning the process, be sure to properly sanitize the scissors with rubbing alcohol.
Cut off all roots that are yellow, brown, or black, as these will be soft and mushy. Cut off any roots that feel brittle, crunchy, or hollow and leave any that have green tips or are otherwise still alive.

In cases of stem rot or when all the roots have rotted away, it may be necessary to cut off the entire stem.
Cut off only the dead parts of your orchid so you don’t risk damaging any of the healthy roots. With proper trimming you can keep your orchid healthy and beautiful!
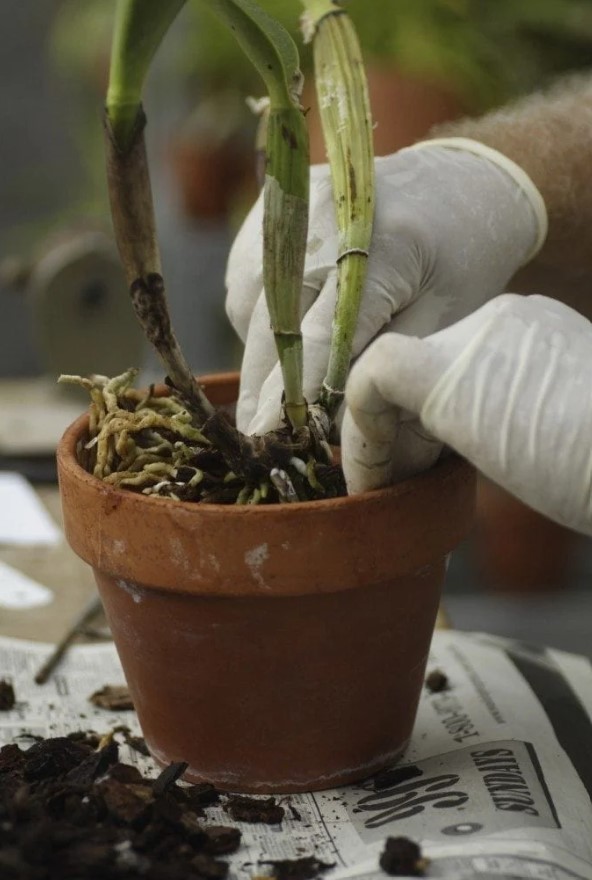
Repot Your Orchid
Repotting your orchid is an important part of keeping it healthy. The first step is to choose a clear pot so that you can watch the roots grow and check up on it.
Make sure it has plenty of holes or slots along the side for ventilation and holes on the bottom for drainage. Fill your pot about two thirds or a little more with your preferred potting mix.
Repotme has the best orchid mix you can buy on Amazon. A mix of bark chips and moss is also recommended. Then, place your orchid on top of the bark and make sure it’s stable before repotting.
If it has enough healthy roots, you can help stabilize it by covering up the roots with more potting mix. Repot your orchid every one to two years, and remember to water it regularly and give it plenty of indirect light.
Following these steps will ensure that your orchid is healthy and happy for many years to come!
Let the Orchid Come Back to Life
Place your orchid in a warm spot that receives filtered light for the best recovery results. An east facing window is ideal, as it will receive indirect morning sun and also provide ample shade throughout the day.
North facing would also work but may not be as effective at providing the indirect sunlight your orchid needs. Avoid placing your orchid directly in front of a south or west facing window as this will be too hot for your recovering orchid.
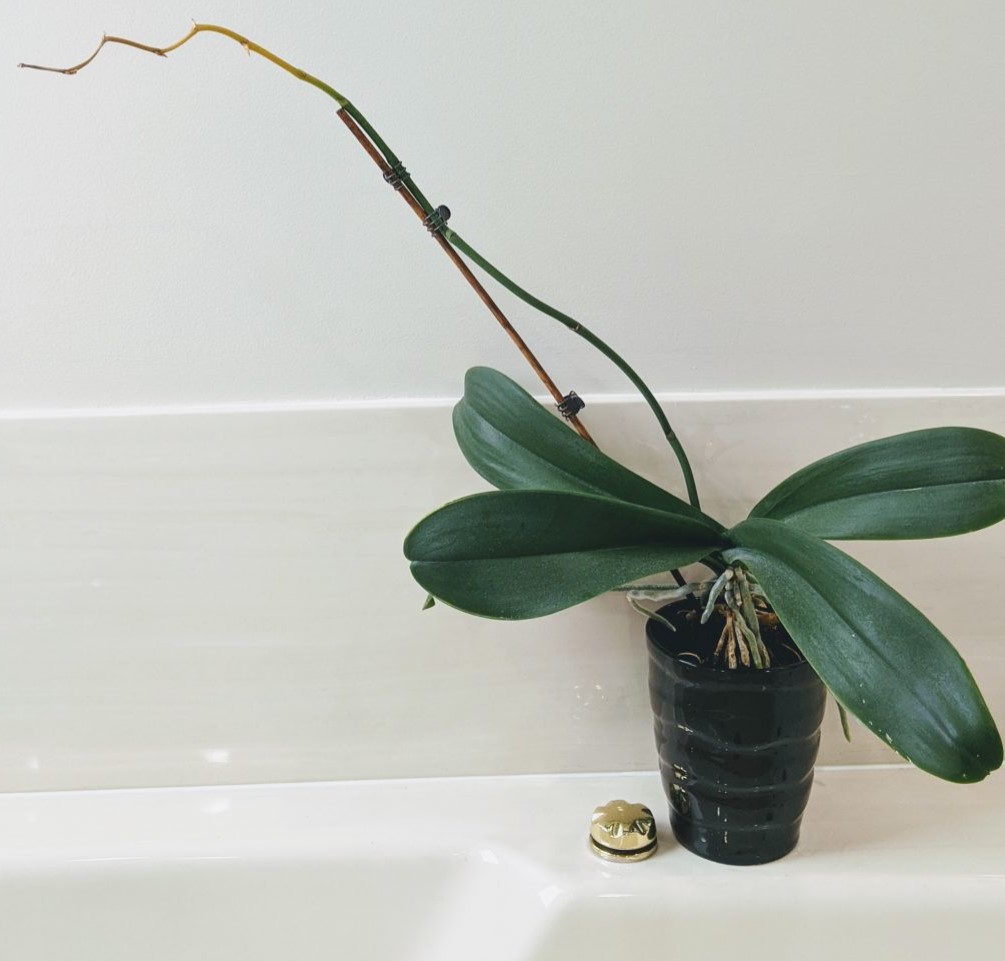
Now, all you can do is play the waiting game and monitor your orchid for signs of recovery. Let the Orchid come back to life, as it takes time for it to adjust to its new environment.
As long as you’ve followed all the steps above, it’s unlikely that your orchid will become worse than what it was when you saved it. With patience and proper care, you can help your Orchid flourish to its fullest potential.
How do you revive a dying orchid?
Reviving a dying orchid is not impossible, but it can be quite challenging. In order to revive it, you must understand what the underlying causes of its deterioration are.

There could be several factors that may have led to the orchid’s decline, such as improper watering, insufficient lighting, disease, pests or cold temperatures.

Can you bring an orchid plant back to life?
Yes, it is possible to bring an orchid plant back to life! In order to do so, you must first prune and repot the orchid. Pruning involves removing dead stems and leaves while keeping healthy parts intact.
Repotting should be done by gently removing the orchid from its old pot, cleaning out any old soil, and then replanting it in a new pot with fresh soil.
Once the orchid is repotted, it needs to have the right amount of water and light in order to encourage blooming. For optimal health, your orchid should be watered once or twice a week and placed in bright indirect sunlight.
With proper care, you should expect to see beautiful flowers blooming from your orchid soon! Can you bring an orchid plant back to life?
The answer is yes, with a bit of effort and proper care. So don’t give up on your orchid—you could be rewarded with stunning floral growth in no time!
What do Overwatered orchids look like?
When an orchid is overwatered, it can be very damaging to the plant. One of the most obvious signs that an orchid is receiving too much water are its leaves.
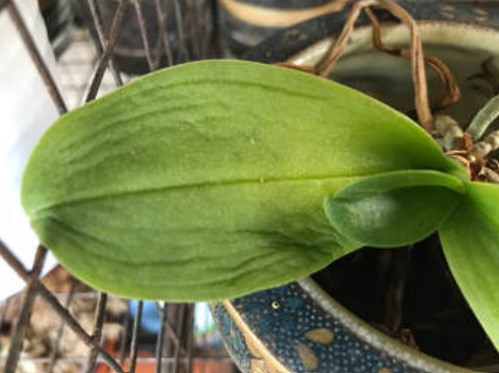
The existing leaves may begin to look limp, yellow and leathery, while new leaves may look pleated and show signs of distress. The color of the leaves may also change from a healthy green to a yellowish hue.
In extreme cases, the roots can become soggy, discolored or smell foul. All of these signs indicate that an orchid is receiving too much water and needs to be watered less often.

If you spot any of these signs, it’s important to take action right away and adjust your watering habits before the damage becomes irreversible.
Many orchid owners find it helpful to stick their finger into the soil of their orchid once a week, to check for moisture levels. If soil is still damp from the last watering, then no water is needed.
Doing this helps ensure that overwatering does not become an issue. Additionally, using soil and potting mixes specifically designed for orchids can help retain moisture without affecting water levels.
If your orchid is showing signs of overwatering, it’s important to take action right away by changing watering habits and switching to a soil mix that will help retain moisture without becoming oversaturated.
Doing so can help your orchid recover and restore it to its former, healthy state.
Overall, understanding what overwatering looks like is key to keeping your plants in good health. Paying close attention to the leaves of your orchids and monitoring moisture levels are important steps for caring for them correctly.
With just a little bit of effort, you can ensure that your orchids stay healthy and happy for years to come.
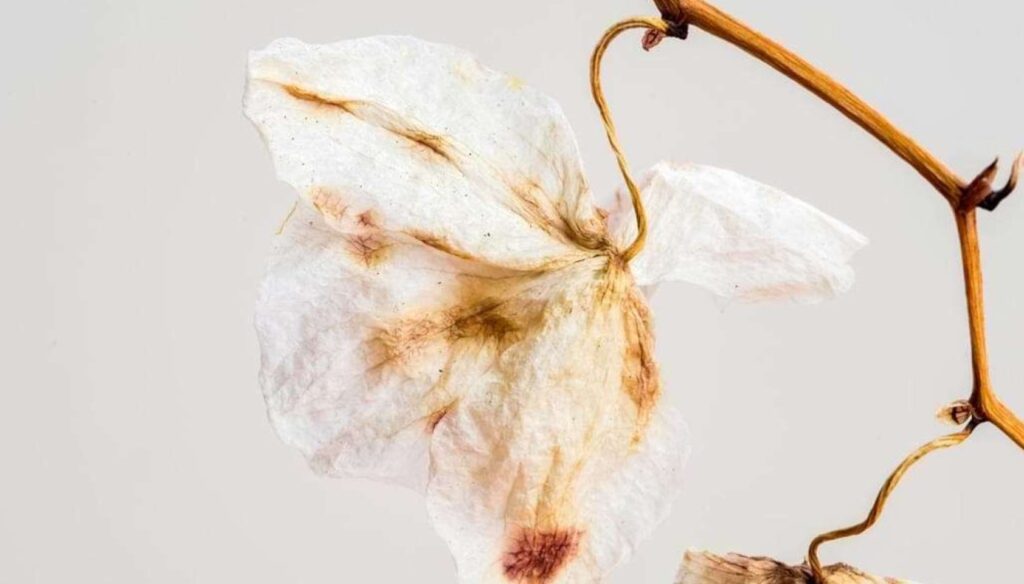
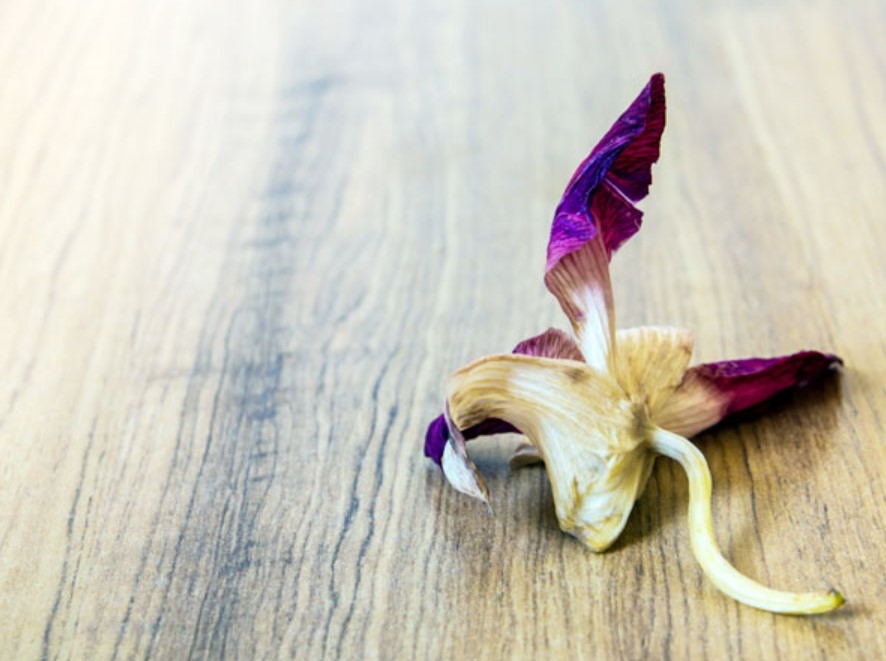
Why are my orchid flowers wilting and falling off?
When orchid flowers start wilting and dropping, it is likely because the plant is done blooming and entering a period of hibernation.
During this dormant period, the orchid will recharge and use stored energy to prepare for another flowering session. It is important to recognize why your orchid is going into hibernation in order to give it the best care it needs to successfully bloom again.
Other reasons for the wilting and falling of orchid flowers include overwatering, underwatering, lack of sunlight, and too much sun.
Overwatering can cause root rot and reduce the plant’s ability to take up water and nutrients from the soil, resulting in wilted and falling flowers.
On the other hand, underwatering can cause the leaves to turn yellow and drop off prematurely. If your orchid is not receiving enough sunlight, it may fail to produce energy for blooming and instead go into hibernation earlier than expected.
On the contrary, too much direct sunlight can cause sunburns on the flowers resulting in wilting and dropping.
Knowing why your orchid’s flowers are wilting and falling off is important in providing the proper care it needs to successfully bloom again.
If you think that the flower drop is due to the plant entering a period of hibernation, then make sure to give it the right environment and adjust its watering schedule so that it is able to recharge and prepare for another blooming session.
If you suspect that the wilting and dropping are caused by overwatering, underwatering, lack of sunlight or too much sun, then assess your orchid’s care routine and make necessary adjustments.
For more information on how to properly care for your orchid during the hibernation period and beyond, please read our guide here.
We hope you find this helpful in understanding why your orchid’s flowers are wilting and falling off and giving it the care it needs to successfully bloom again! Read also…
How do you revive a dying orchid?
To revive a dying orchid, identify and address the underlying problem, adjust the growing conditions, prune damaged parts, treat pests or diseases, and wait and observe for signs of improvement.
What do overwatered orchids look like?
A dying orchid may have yellow, brown or drooping leaves, and the roots may be brown, black, or mushy. The flowers may also drop prematurely, and the plant may have an overall unhealthy appearance.
What a dying orchid looks like?
A dying orchid may have yellow, brown, or drooping leaves, and the roots may be brown, black, or mushy. The flowers may also drop prematurely, and the plant may have an overall unhealthy appearance.
Will orchid regrow after dying?
If an orchid is completely dead, it will not regrow. However, if there are still some healthy roots and leaves remaining, there is a chance that the orchid may recover and regrow with proper care and attention. It is important to identify and address the underlying problem that caused the orchid to die in the first place to prevent further damage.
How often should you water an orchid?
The frequency of watering an orchid will depend on several factors, including the orchid species, the potting medium, and the growing conditions. In general, most orchids should be watered about once a week, or when the potting medium is almost completely dry.
How do I get my orchid to grow again?
To get your orchid to grow again, provide adequate light, water correctly, fertilize regularly, repot when necessary, prune as needed, and provide proper humidity.
Is sugar water good for orchids?
Sugar water is not good for orchids as it can promote the growth of harmful bacteria and fungi in the soil, leading to root rot and other plant diseases. It’s best to use a balanced fertilizer specifically designed for orchids to provide them with the nutrients they need to thrive.